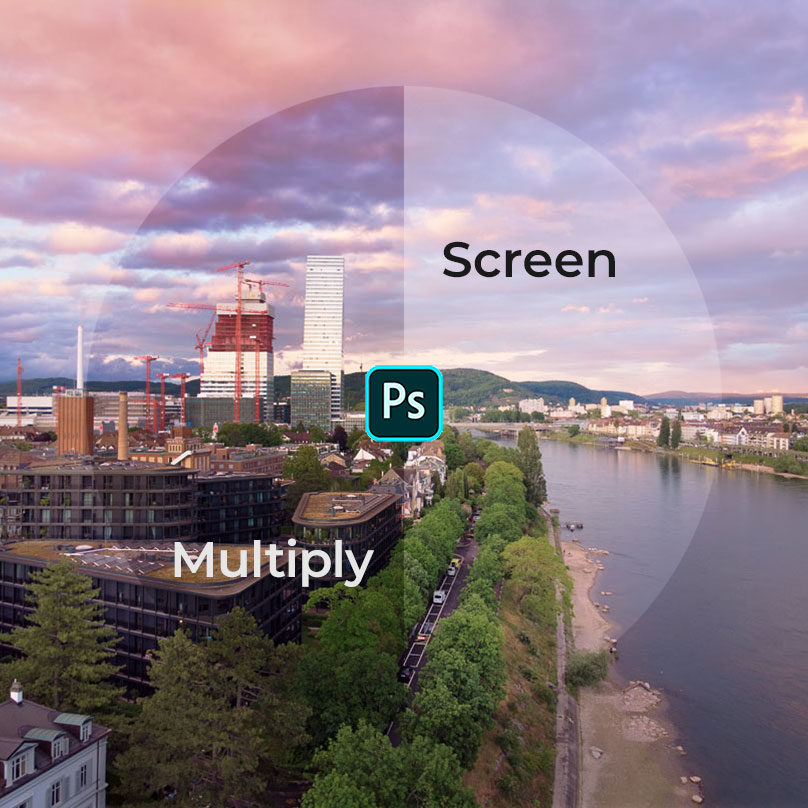
How Multiply and Screen Blending modes can help you edit your photographs
Hello there fellow photographer! In this tutorial I’ll tell you how I use the blending modes “multiply” and “screen” to edit my images in photoshop. These two are a must on almost all the images I pull into photoshop. Let’s see whether this information is helpful to you – or maybe you can tell me how to achieve these results in a better way.
Introduction
Ever wondered what all those different layer blending modes in photoshop are? I surely did – and I still struggle to find a use for some of them. However, “Multiply” and “Screen” are the two blending modes I use the most when editing my photographs. The main use for me is to brighten or darken certain parts of the image without it looking unnatural.
Of course I did not invent any of those techniques – I gathered them in countless hours of Youtube videos and blogposts and made them work for me. Unfortunately I’m not sure where exactly I picked up what, but I will link to my favorite resources at the end of this article.
I’ll start with some basics about layers, blending modes and adjustment layers. If that’s all already clear to you and you want to get going right away jump to the first blending mode Multiply. If not, keep reading on:
Layer Blending Modes
To get on the same page: What am I talking about with layer blending modes? This is a basic concept in Photoshop how multiple layers affect each other to produce a final result.
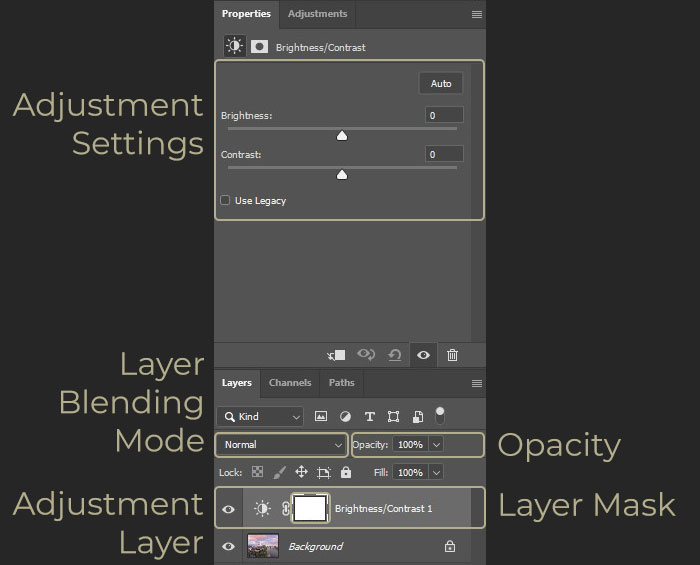
If nothing is changed, each layer is stacked on top of the other one and it is as if you were looking at them from the top. In the screenshot shown, the “brightness contrast” layer sits on top of the “background” layer. The layer has among others: attributes, opacity, a layer mask and a layer blending mode. The default blending mode is “normal”.
However, if you change the blending mode of a layer, it does not just sit on top of another layer. It can change the way the underlying layer looks. In this article we are going to look at the layer blending modes “Multiply” and “Screen”. But first, let us compare an adjustment layer with a blending mode to a copy of the image with a blending mode.
Why Adjustment Layers with Blending Mode
Before we jump into the details of how I use multiply and screen blending mode in my photographs, let’s have a look at why I use adjustment layers.
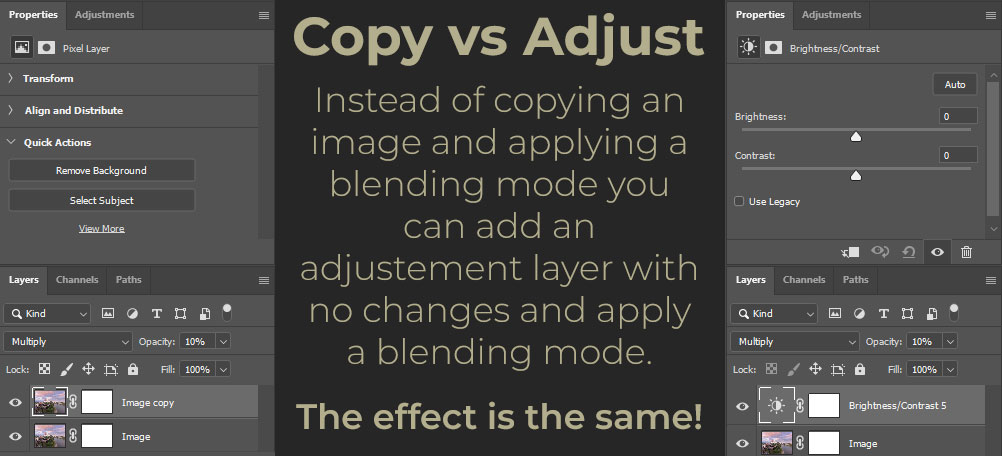
An adjustment layer with no changes does nothing to the image as long as the blending mode is normal. But as soon as I change the blending mode the image changes. This is essentially the same as creating a copy of the whole picture in a new layer and applying the same blending mode.
So why would I use an adjustment layer instead of just using the same image on a new layer? For two reasons:
- When I’m stacking multiple adjustment layers, I can go back and change things in layers below. If I inserted a new image this may not always work.
- Save memory: adding a new layer with the whole image contains much more data than an adjustment layer.
So in essence, an adjustment layer with no changes and blending mode “normal” does nothing at all. If I change the blending mode to anything else, it’s like using the image itself with the blending mode.
Armed with this knowledge, let’s dive into multiply and screen.
Multiply
From here onwards it might be the easiest for you to have Photoshop open beside it with an image loaded and tag along. First things first: what does this blending mode do? Lets look at the Adobe Help Article:
Multiply: Looks at the color information in each channel and multiplies the base color by the blend color. The result color is always a darker color. Multiplying any color with black produces black. Multiplying any color with white leaves the color unchanged.
Do you get it from this? Good for you, I certainly didn’t. The one thing that stuck is: You get a darker image. So how is this useful when editing my images?
At first I thought I had to paint on a layer in “multiply” blend mode and try to edit my image this way. But this never worked out and looked horrible! The trick I then learned was to use the image itself to darken. Confused yet?
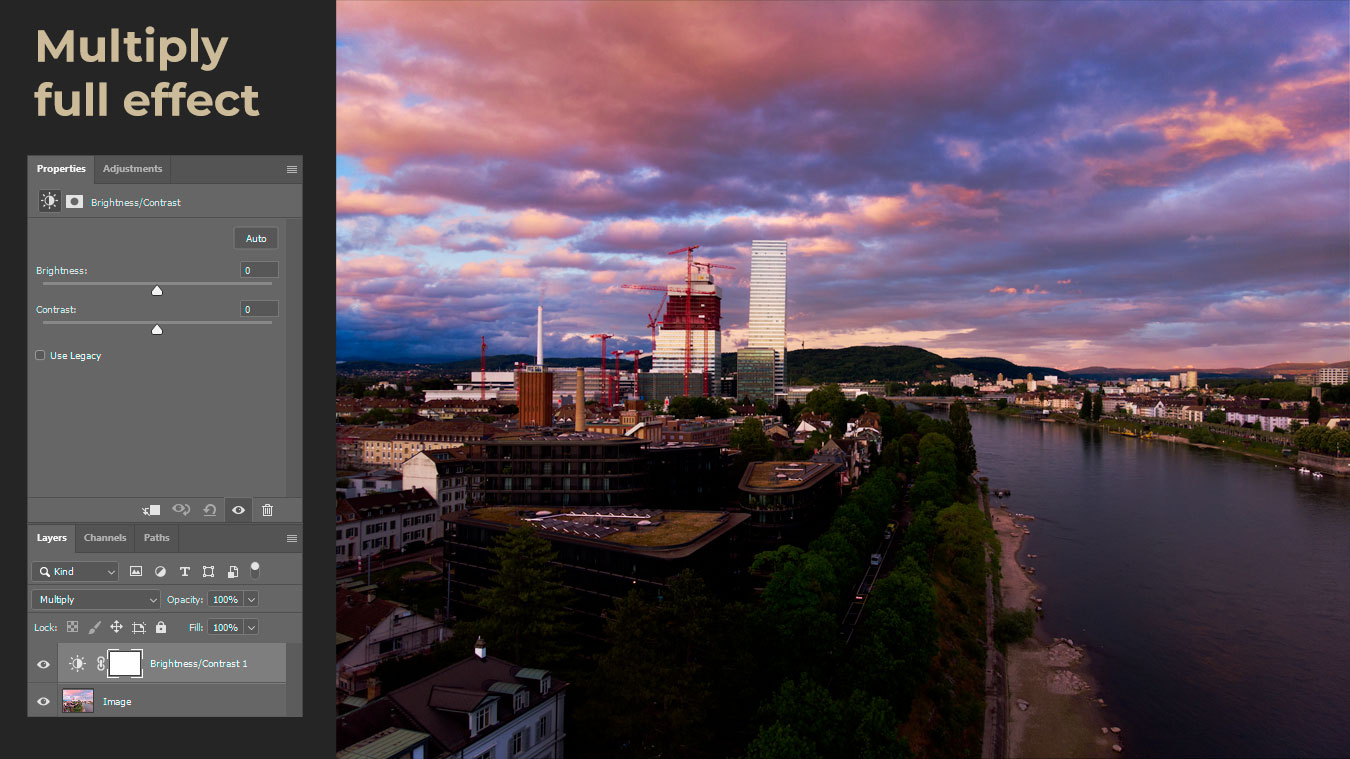
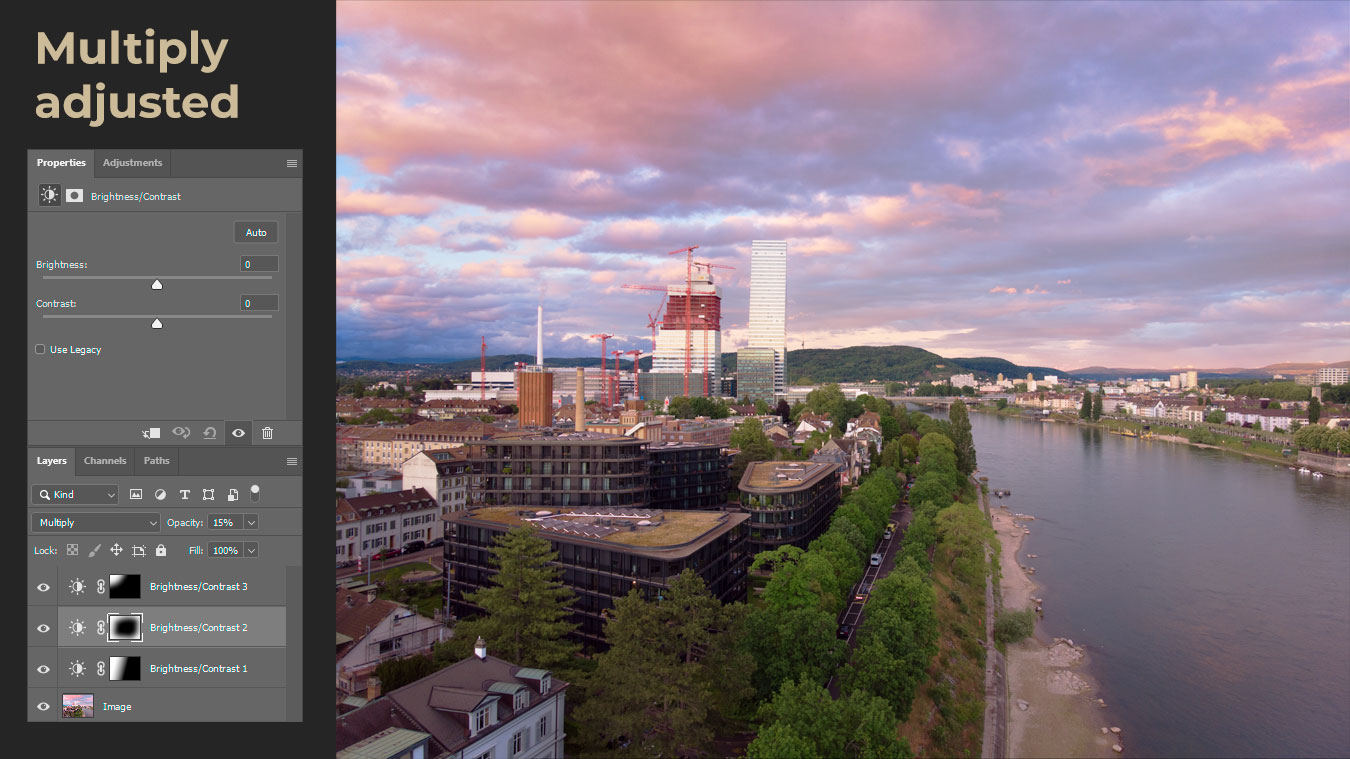
Don’t panic, it is rather easy: create an adjustment layer on top of your image. For example a curve, hue saturation or brightness and contrast. Change nothing in the adjustment layer – but set the blend mode to “multiply”. And suddendly your image is darker – a bit extreme I admit, but we are going to take care of this in an instant. Notice that it affects already darker areas stronger than very light ones.
Next, change the layer mask from white to black by selecting it and then press Ctrl + i, which hides the whole effect and gives us the original image.
Now choose a soft brush and set a low flow (I tend to use 2 – 20 %), set the color to white and start painting on the mask. And now look at this: where you paint the image is going to get darker.
If you managed to paint somewhere where you don’t like it switch the color to black and paint the effect away. You can also lower the opacity of the layer if the overall effect is too strong.
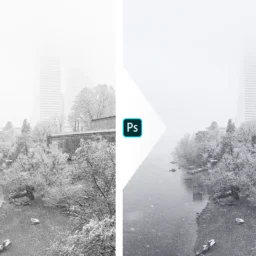
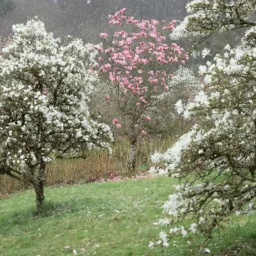
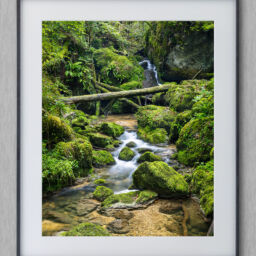
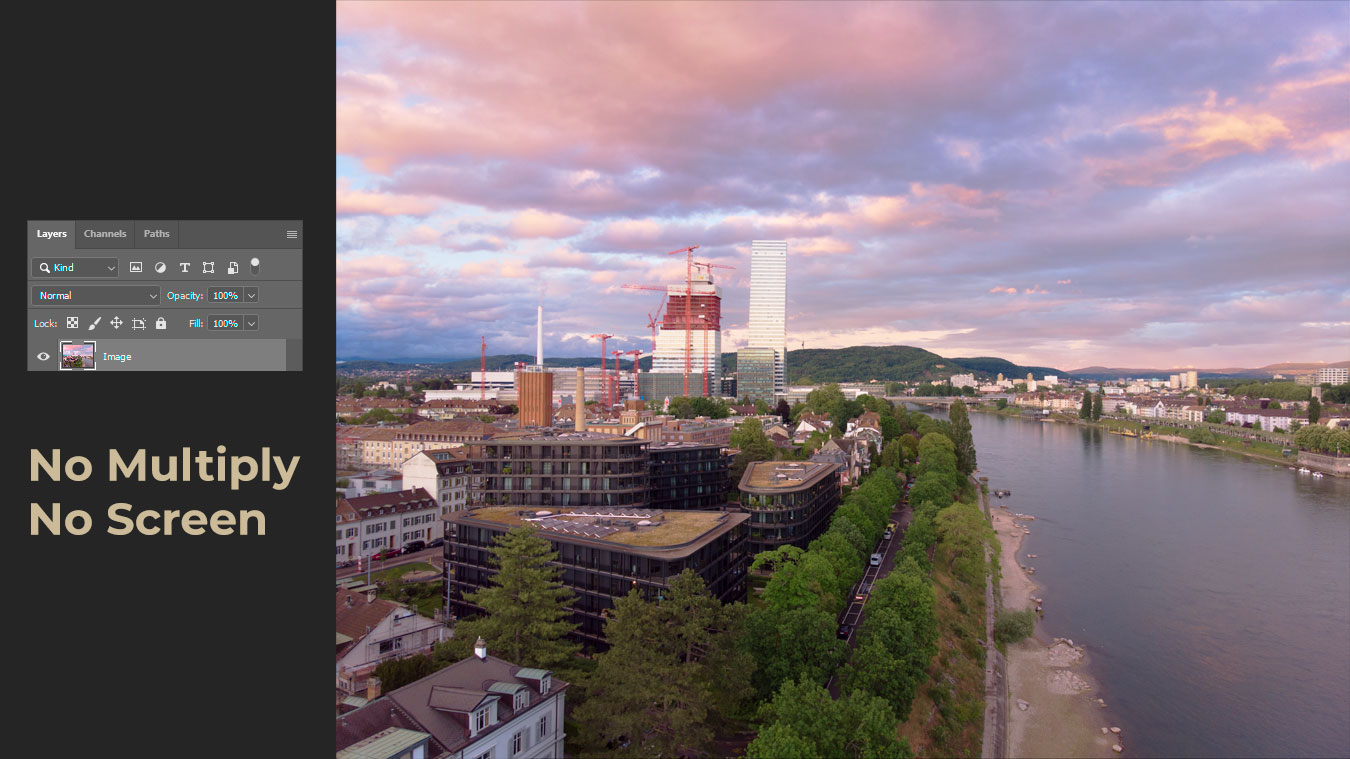
Now you can see an example of an image before and after applying some darkening with multiple layers in multiply blending mode (😄). It’s a subtle effect, mainly on the left side of this image. But you will see: together with brightening in screen mode, it’s going to be meaningful.
There is a trick to protect your darkest tones from becoming pure black, but I get to this at the end of this article. Let’s first look at the “Screen” blending mode
Screen
The “Screen” blendmode is the opposite of “Multiply”. Lets look again at the Adobe Help Article:
Screen: Looks at each channel’s color information and multiplies the inverse of the blend and base colors. The result color is always a lighter color. Screening with black leaves the color unchanged. Screening with white produces white.
I still don’t understand what exactly this means, but I get it makes things brighter.
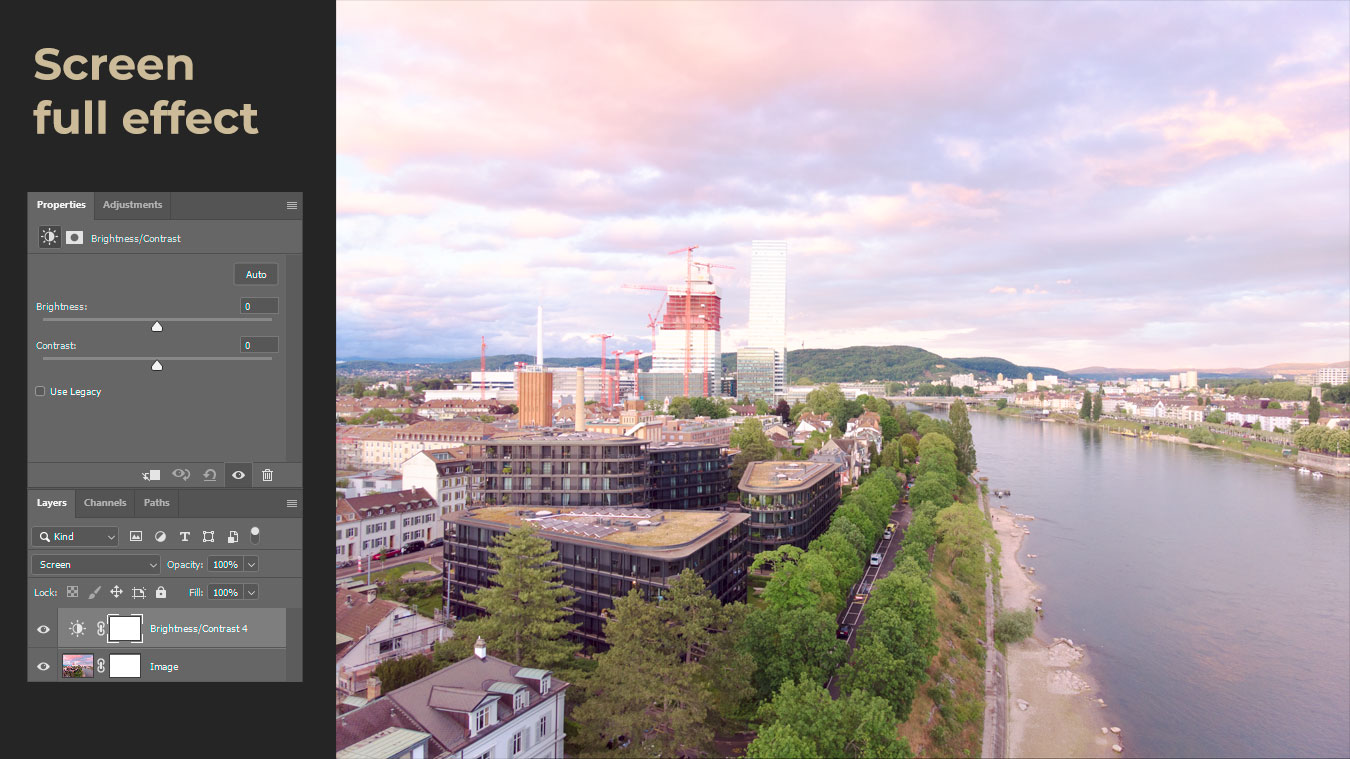
Let’s do the exact same thing as above. First, create a new adjustment layer. Don’t change any settings, only set the blend mode to “screen”. You’ll notice that the image is now a lot brighter, especially the already bright parts.
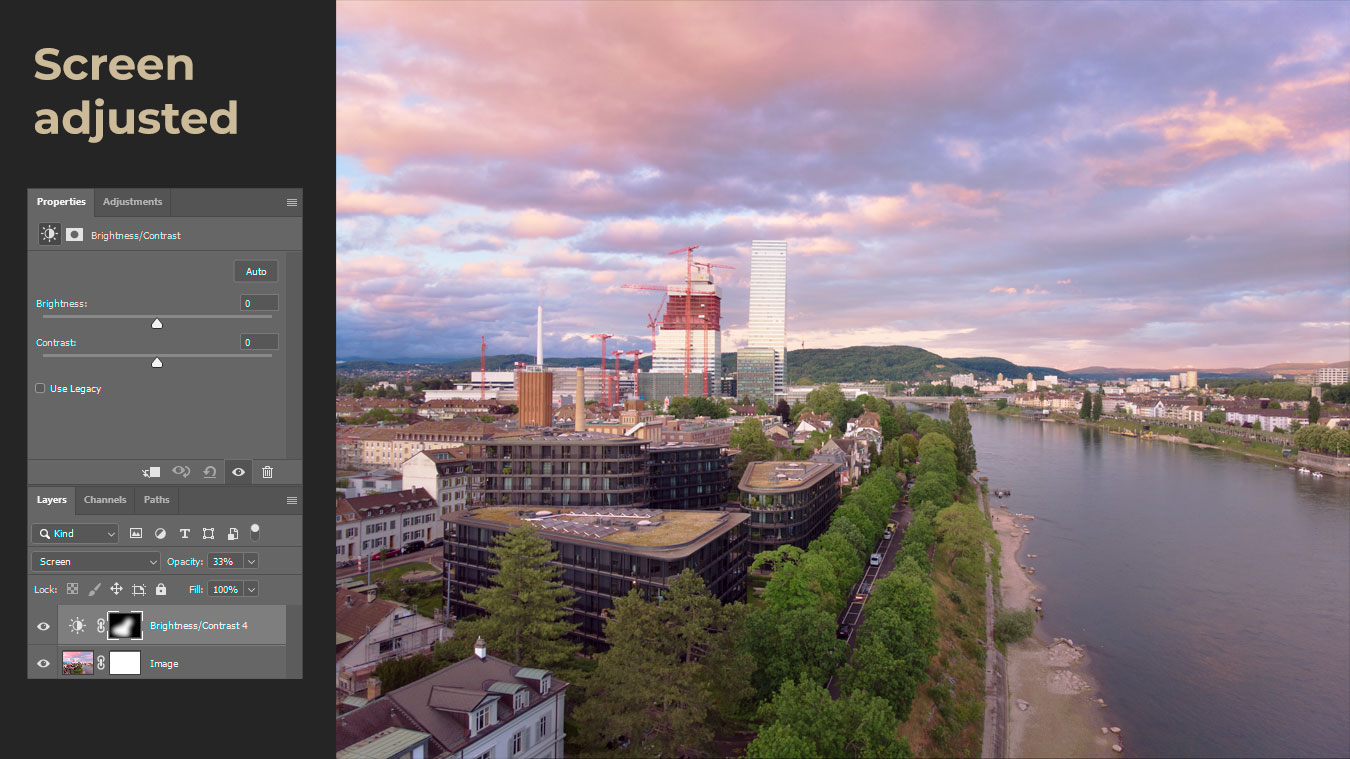
Next, switch the layer mask to black by selecting it and pressing Shift + i. This again makes the effect disappear.
And just like above, choose a soft brush, low flow and select white as your color and start to paint on the mask to brighten where you think it is helpful. If the effect is too strong you can revert it by painting with black on the mask, or also by lowering it’s opacity.
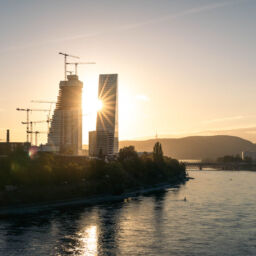
Again, the effect is not too strong if you just look at the changes we made using the “screen layer”. But it does put a bit more brightness into areas you may feel need it.
Combine Multiply and Screen
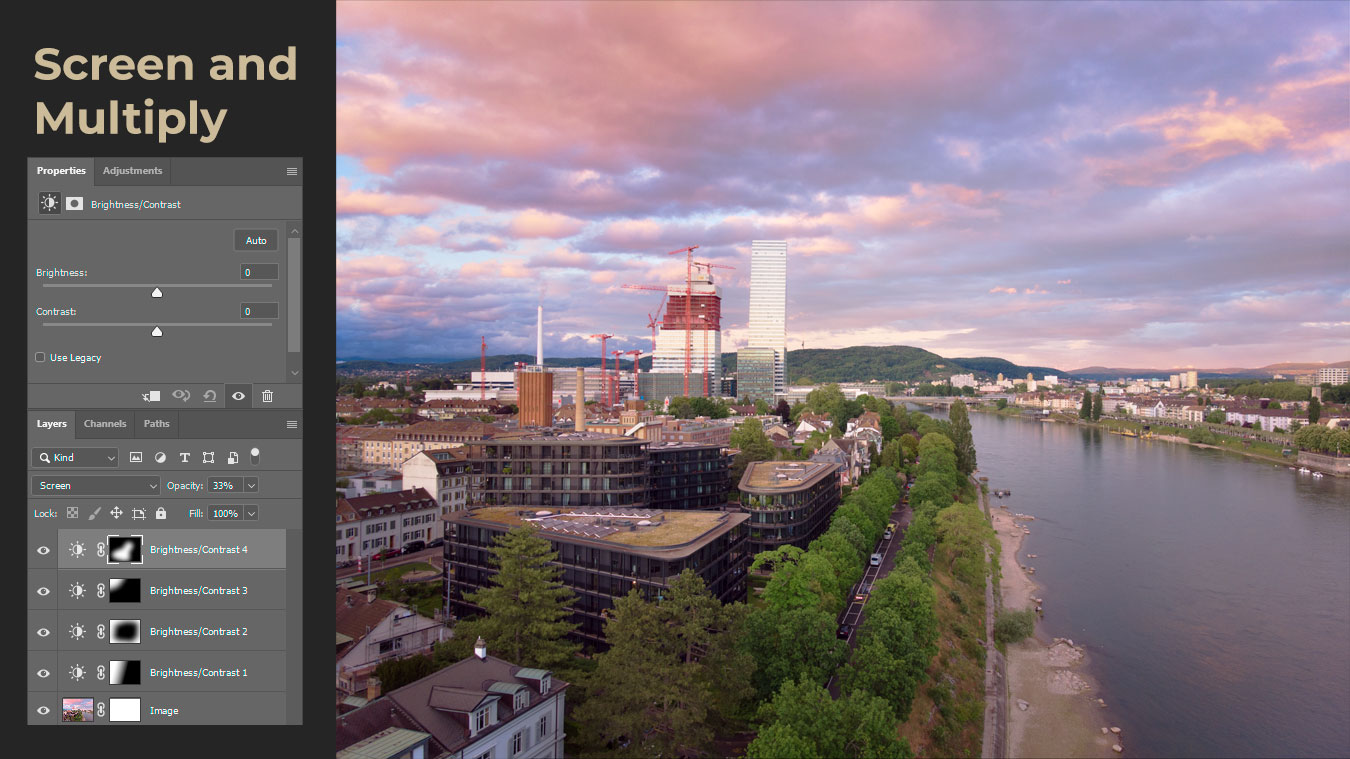
What I often do as soon as I have an image open in Photoshop is to create immediately two ajustment layers, set one to “multiply” and the other to “screen” blend mode. I’ll chuck on two black masks and then start painting in lights and darks. It’s a way to emphasize certain parts of your image more, and hide some away which are rather distractive.
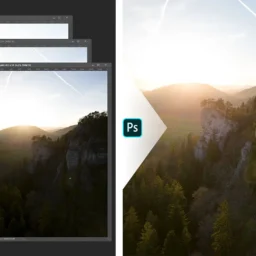
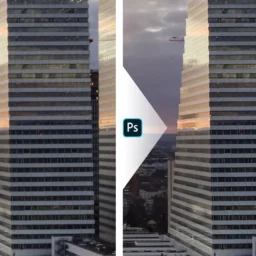
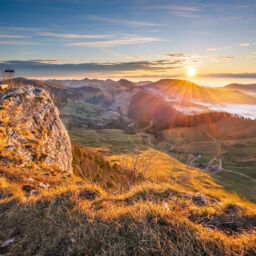
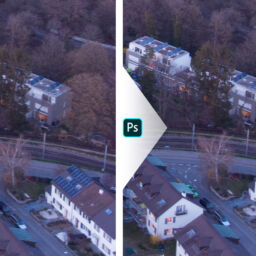
If you look at the before and after in the image below, the effect is again not strong, but it changes the balance. In the before, the left side is so much brighter that my gaze is always wandering there. In the after, this is no longer the case, it’s much more centered and more emphasis on the trees in the foreground.
I also use the technique to create my own handpainted vignettes which are hopefully not as obvious as the automatically created ones. Depending on your image you may be concerned that parts get too bright or too dark. You can avoid this with a simple trick: Blend-If
Blend-If
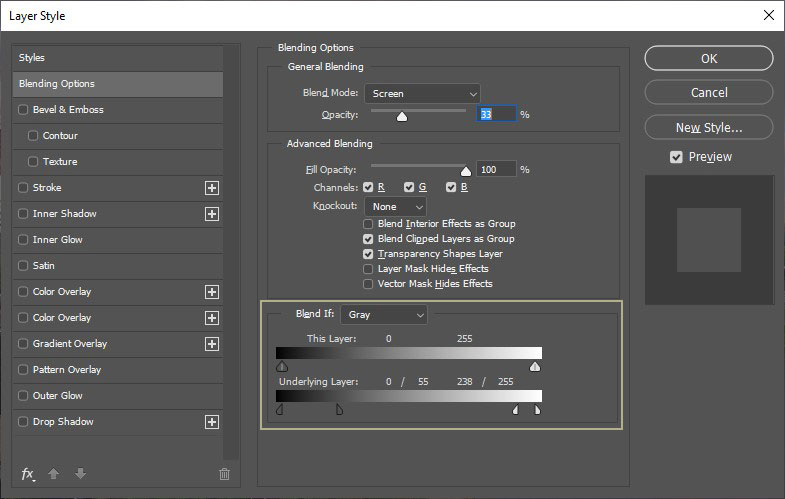
If there is one thing I find very useful in Photoshop then it is “Blend-If” on layers. To get into this option double click on the right side of a layer. In the upcoming dialogue, there is the option to limit the effect of the layer depending on the brightness of the underlying layer (your image).
What I tend to do on my “multiply” layers is to protect the darkest tones. I hold “Alt”, click on the left slider and drag it up to the right. On my “screen” layers I hold “Alt” and drag the right slider a bit down to the left.
Don’t worry if you don’t understand this yet, I will probably write a blogpost just about blend-if and how awesome it is 🙂
Conclusion
Mutliply and Screen layer blending modes in Photoshop are a handy tool to brighten and darken your photographs in certain areas. I find it easy to set up and easy to paint in light and dark. At any point in time I can paint it away again, control the intensity of the effect or simply remove it. And the best: my original image is not changed whatsoever.
I’m aware there are many other tools and ways to get to a similar or the same result. This is currently my way and it works out fine for me. But maybe you use other tools or technique. I’d be curious to learn about them!
As I said at the start – I did not invent any of those techniques myself but rather gathered them on the web. Here are my go-to channels on youtube for Photoshop.
First there is Piximperfect: Unmesh is simply “the” photoshop teacher on Youtube. I like his style and his clear and structured way to teach a certain subject. Then there is f64 academy which I love too. Blake’s enthusiasm for photography and editing is awesome and I learned a lot of techniques from his channel.
And then there is the TK7 Panel by Tony Kuyper which I use a lot too. I use it for editing in Photoshop, but I also picked up a thing or two from it. The way it condenses myriad of helpful tools into the panel is amazing and a lot of the tools give me possibilities to edit images in a way I could not do easily without it.
Did you like this Blogpost?
I hope it proves useful and you can take something with you. Let me know below if you have any questions, comments or suggestions.