Workflow: Exposure Blending in Photoshop
In this tutorial, I will present a workflow for exposure blending in Photoshop CC 2023. This is a process to merge multiple exposures of the same scene – also called an exposure bracket – to capture more information in the resulting image.
Introduction
Hello there fellow photographer! Today I’m going to talk about blending different exposures of the same scene. Why would you want to do this? If you are trying to shoot a high dynamic range – meaning you have very bright, but also very dark parts in your scene – you can use exposure blending to incorporate a larger dynamic range than your camera can capture.
But cameras have gotten so much better these days, they can capture a much greater dynamic range than ever before. So, is this technique still needed? Short answer: YES. Maybe you don’t have a high-end camera. Maybe your drone is not capable of capturing the same dynamic range. But even when using a modern mirrorless camera, when shooting directly into the sun, every camera I ever used struggled with the dynamic range. I also find color rendition in the shadows and the brightest highlights is better when doing an exposure bracket.
There are of course many methods to achieve comparable results. Lightroom Classic has a feature to merge multiple exposures into one high dynamic range file. But what I’m going to showcase here, is a method using the “Apply Image” command in Photoshop, along with some “blend-if” for refinement. In my opinion, this methods allows for softer blends and more natural colors.
In order to follow this tutorial, you need a minimal understanding of Photoshop: namely what layers and layer masks are, and being able to read the histogram will also be helpful. If this is new to you, I advise to read up on this topic prior following this tutorial.
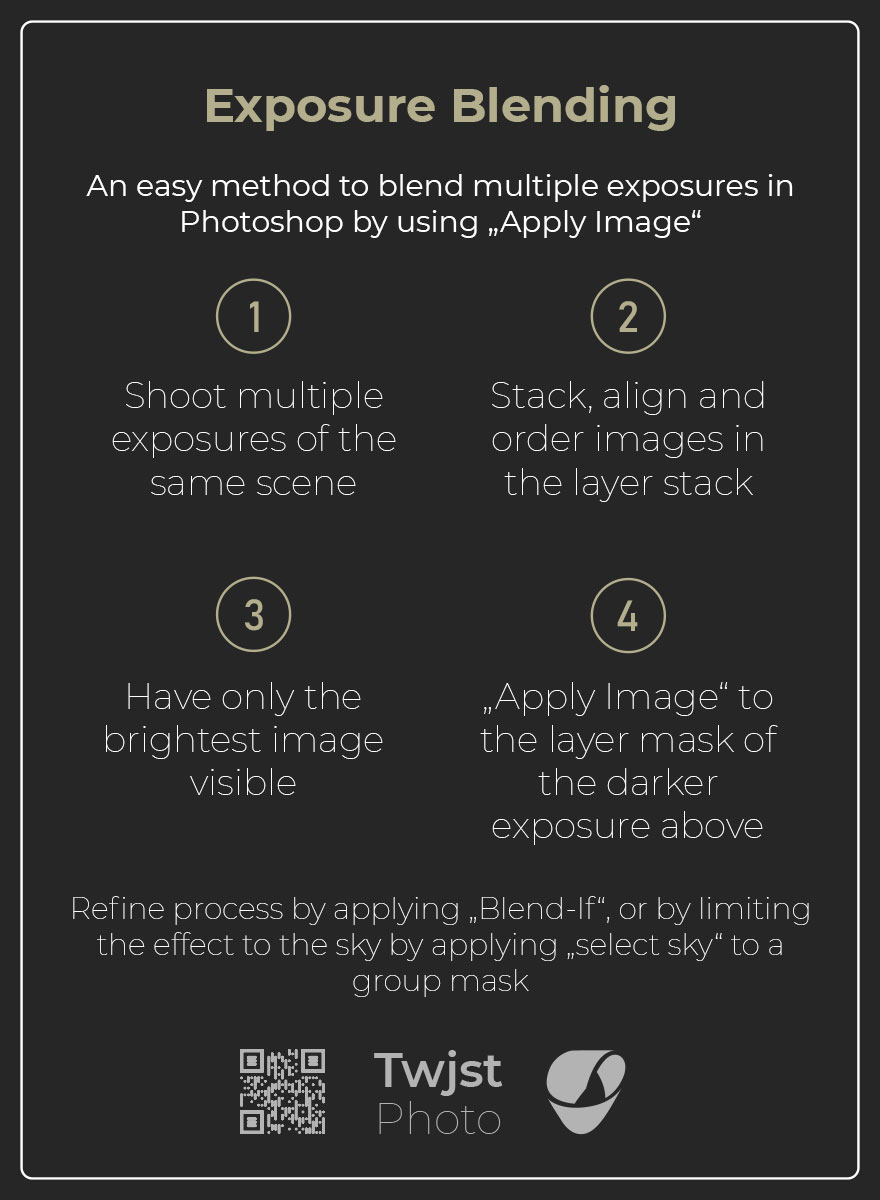
As usual you can get a cheat sheet with summarized steps at the end of this blogpost. But first, let’s get into the more elaborate explanation of the workflow.
Detailed Step by Step
Table of Contents
Step 1 – Take exposure bracket
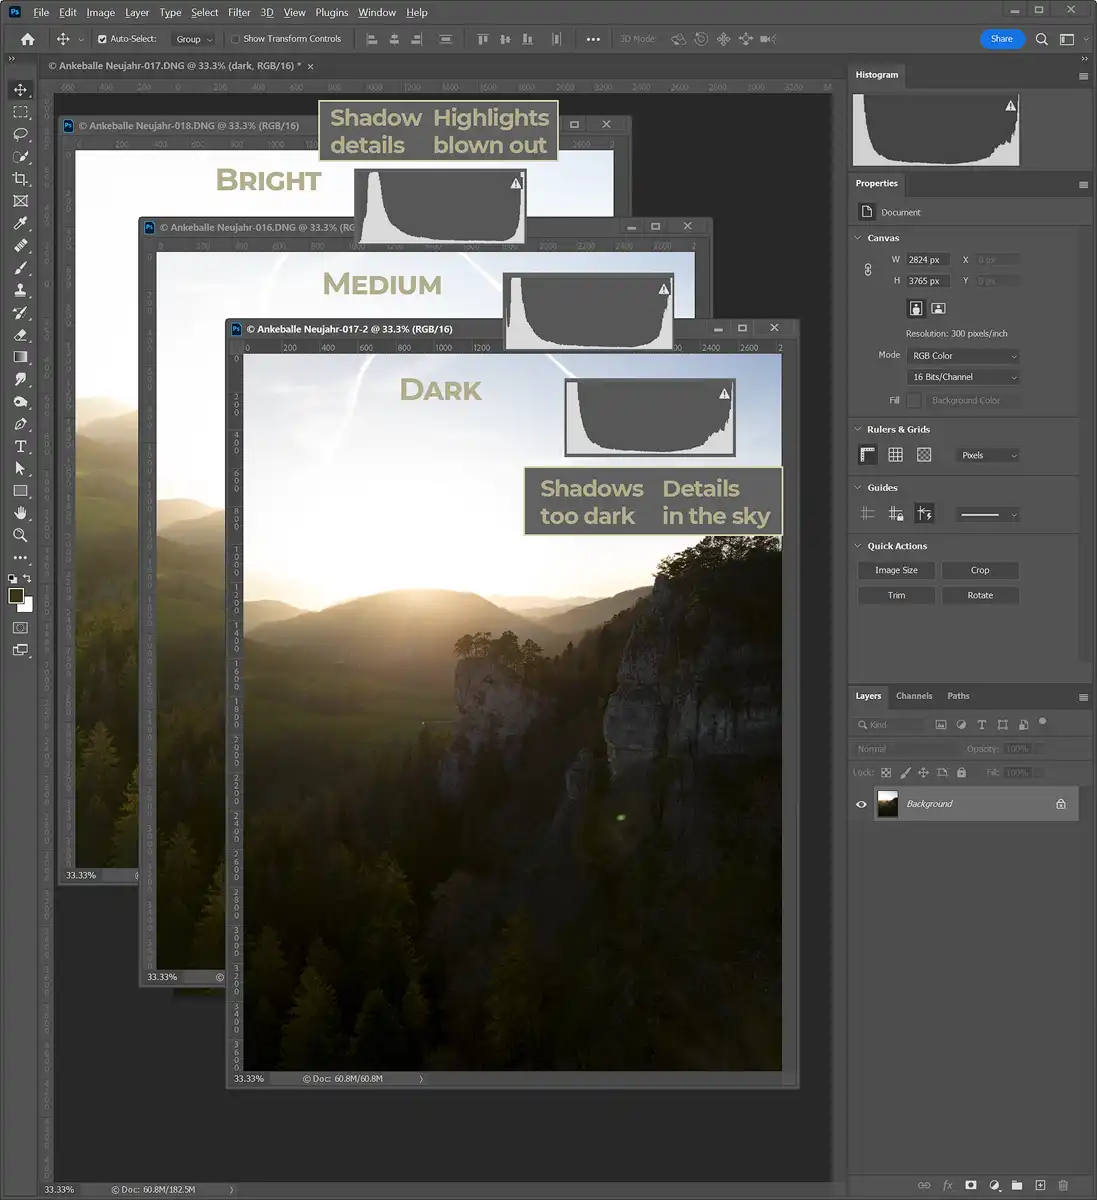
This is of course not part of the exposure blending, but a pre-requisite. Most cameras have an exposure bracket function, where multiple images with different exposures are recorded in quick succession. Classically you would get three or five images, from dark to medium to bright. You can also do this manually, where you would dial in different exposures.
Since you are going to merge the images later, you best use a tripod and take the images in very quick succession. This will minimize the chances of the images not lining up, or the scene to be changing in-between shots.
If you would like to follow along in Photoshop, but don’t have suitable images at hand, you can download my unedited sample images instead.
Step 2 – Open Images in Photoshop
Do only minimal editing on your individual images prior to this workflow. I only do cropping and white balance adjustments.
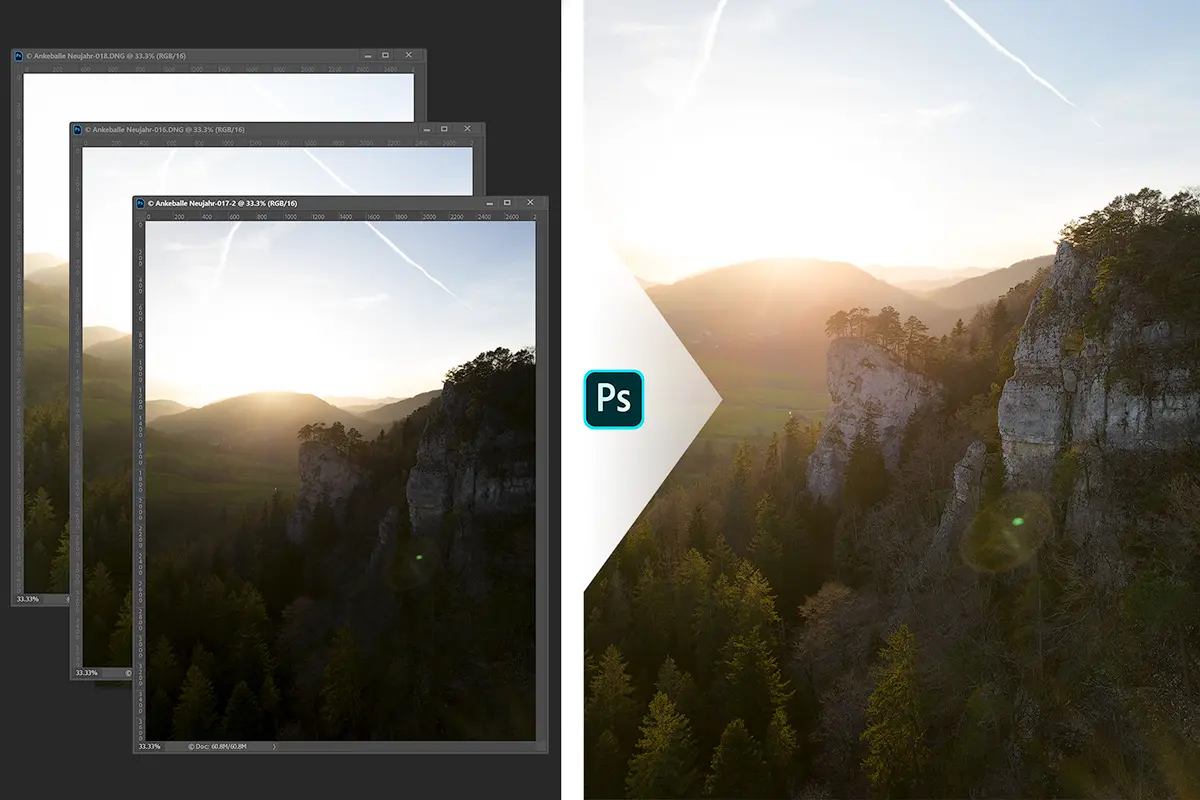
Open your images in Photoshop. One way to do this is to select them all in your lightroom catalogue, right click and choose “open as layers in photoshop”. This will make the next step easier. But you can also open them individually, as shown in the next image.
Step 3 – Stack, Align, and Order your images
Stack: If you have already opened the images as layers, then you can skip this part. If you have them open as individual documents, then choose the move tool (shortcut V). Click on one image and drag it up on the tab of another image, then drag it down on the canvas of the new image. If you hold “shift” while doing this, it will center the dropped image.
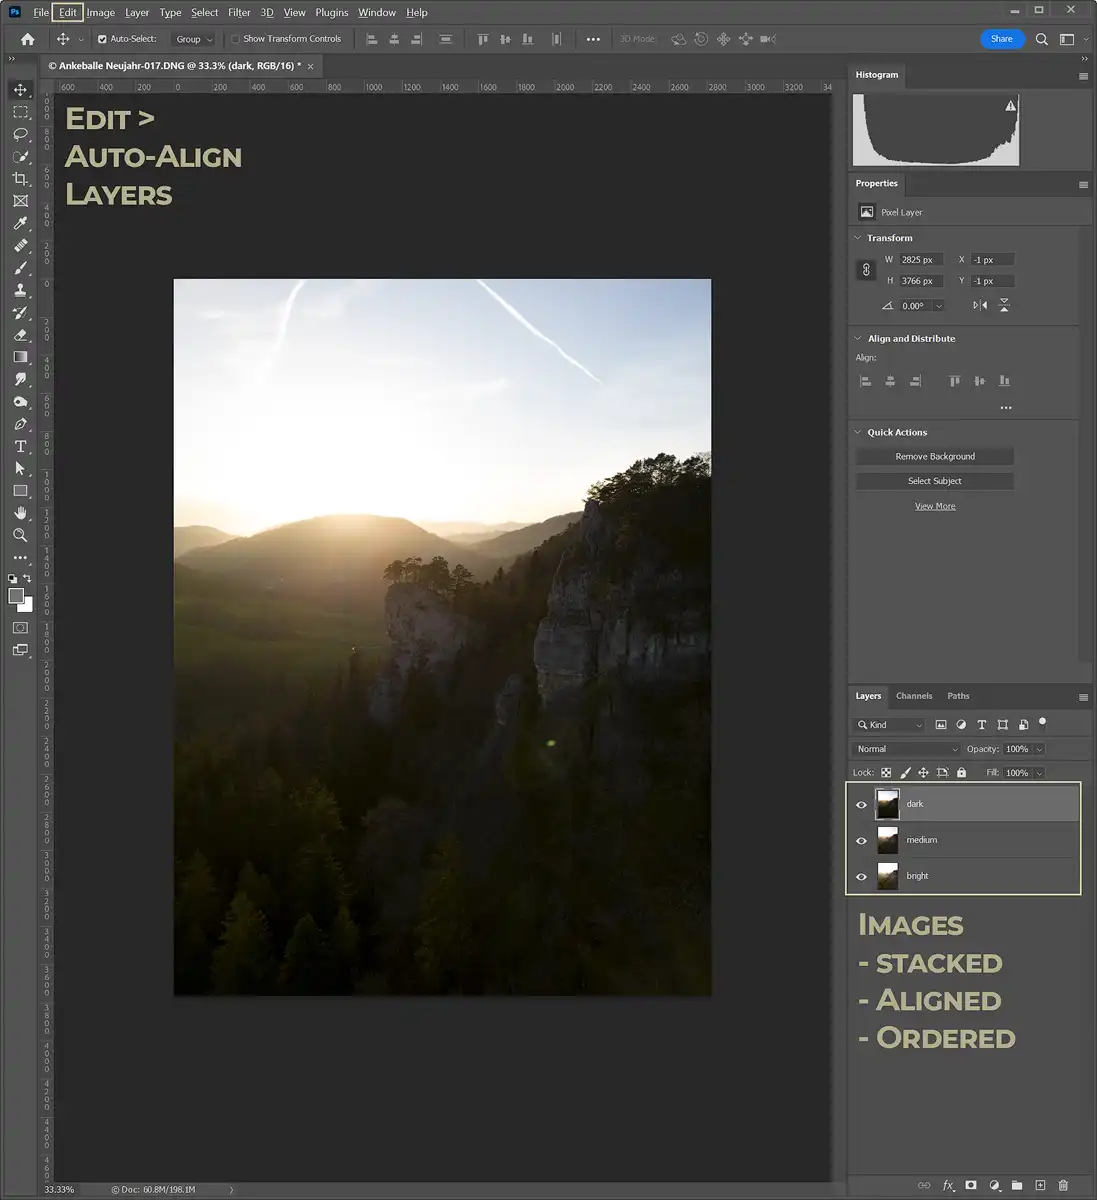
Align: select all your layers. Then choose Edit > Auto-Align Layers, choose “Auto” in the upcoming dialogue and hit “OK”. This should correct for any minor movements of your camera while taking the images.
Order: if not already the case order your layers in the following way: the brightest exposure at the bottom, darkest on the top.
Step 4 – Use “Apply Image” to Exposure Blend
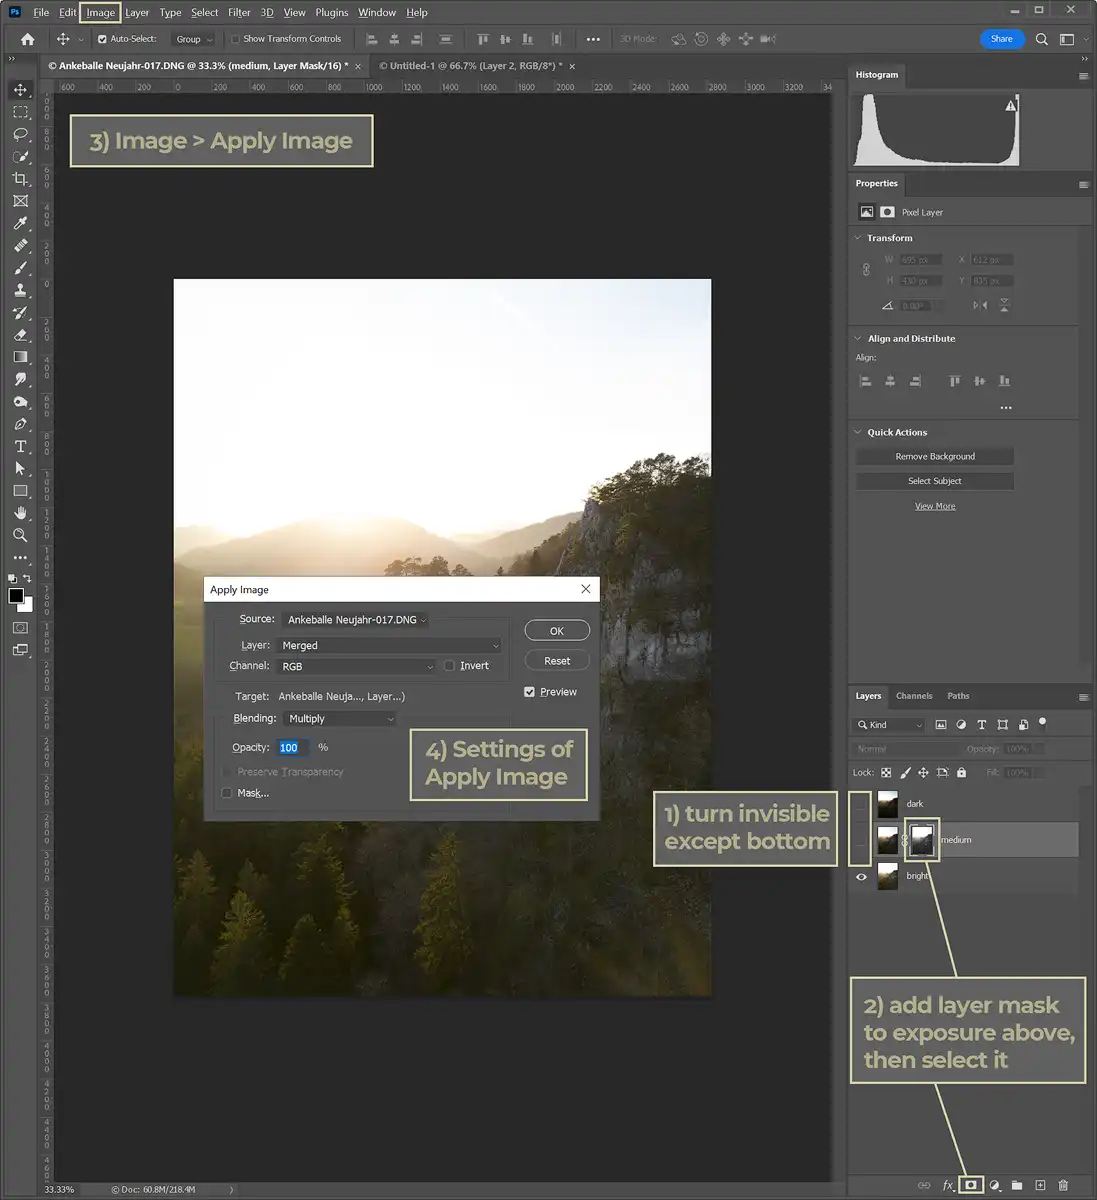
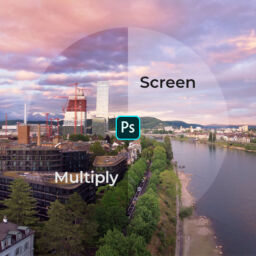
Now to the actual exposure blending. First make all layers invisible except the bottom one (which should be the brightest). Select the layer above the bottom one and add a mask to it. Make sure that mask is selected. Now choose Image > Apply Image… In the upcoming dialogue have the following options selected: Layer > Merged, Channel > RGB, Blending > Multiply, Opacity > 100%. Then hit OK.
This will create a black and white version of your bright image as a layer mask in the darker layer above. The function of this layer mask is now, to replace the too bright parts of the image with what was recorded in the darker exposure. If you now turn on the visibility of this mask, the image will be darker and less contrasty. But most importantly, you will get more details in the brightest areas of the image.
Now repeat the process above with the next even darker exposure. Add a layer mask to your darker exposure, “apply image” to this layer mask and then turn on the visibility. Rinse and repeat until all exposures are processed.
You could stop at this point
That’s pretty much all that there is to it, you successfully merged multiple exposures into one image! While this description looks like a lengthy process, if you go through it a couple of times it should only take you a few minutes.
The result is by no mean a finalized image, but a great starting point for any editing.

Bonus Step – Refine with Blend-If and Masking
The process above is absolutely fine to get a good starting point for editing. However, there is a way to refine results even further.
You will notice that your image will overall get darker and much less contrasty. Using “Blend-If” can be a great way to refine the process – after blending or after every round. In this blogpost, I’m going to just tell you how to use Blend-If in this particular scenario, you can read more in depth about it here: “Blend-if in Photoshop“.
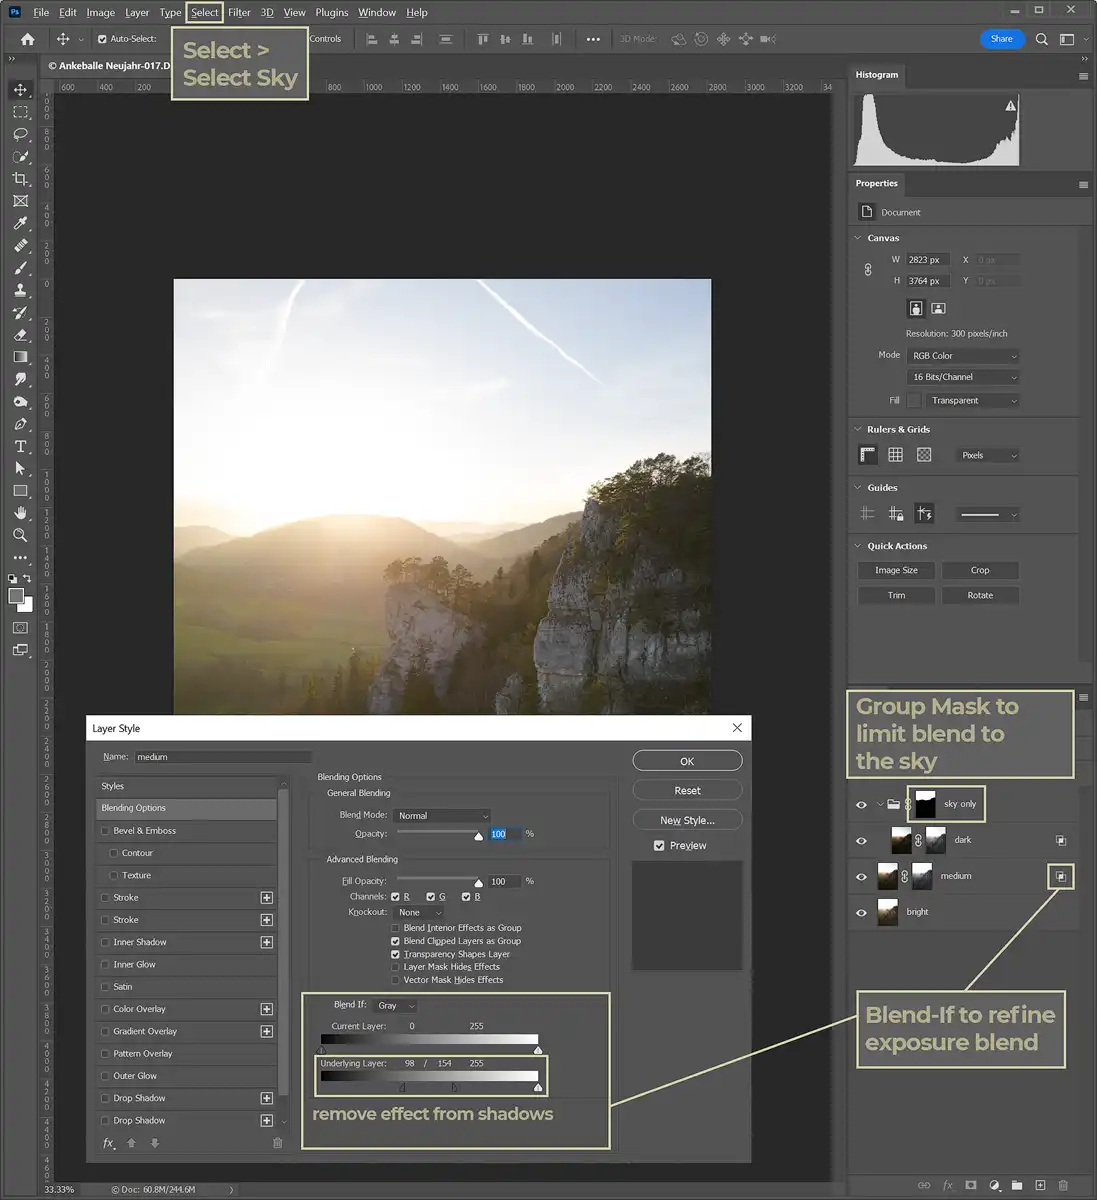
To get to the Blend-If options double click on the right side of the layer with the mask on. In the upcoming dialogue, modify the “Blend-If” of the “underlying layer” by moving the left slider up. This will protect the darker parts of the image from the effect and keep some of the brightness and contrast. You can split the slider up by holding “Alt” while clicking and dragging, this will smooth the effect and prevent artefacts.
Another useful way is to use the “Select” > “Select Sky” feature. Usually, Photoshop does a great job selecting the sky. Then you can put the darker exposure layer into a group and add a layer mask. If the sky selection is active at this point, the layer mask of this group will now limit the effect only to the sky. This is a technique called “masking the mask”: your mask from “apply image” is present on the image layer, and the group layer mask is limiting everything inside of it to the sky.
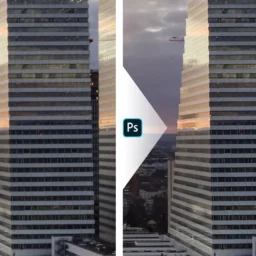
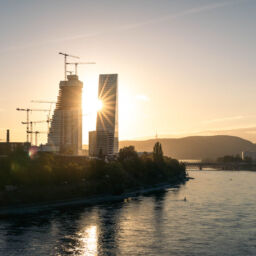
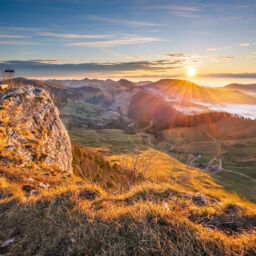
Final Result
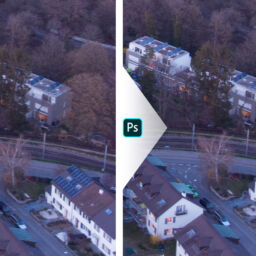
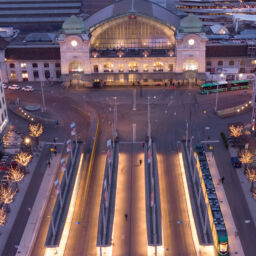
And below is the result of the exposure blend! I find this method to give very natural looking images, far away from an over-processed HDR look. The second image is the result I achieved from this basis with further editing in Photoshop.
Please let me know what you find useful, give feedback or other ideas below in the comments!


Cheat Sheet
🎉Tadaaaa, there you go. You are most welcome 🙂
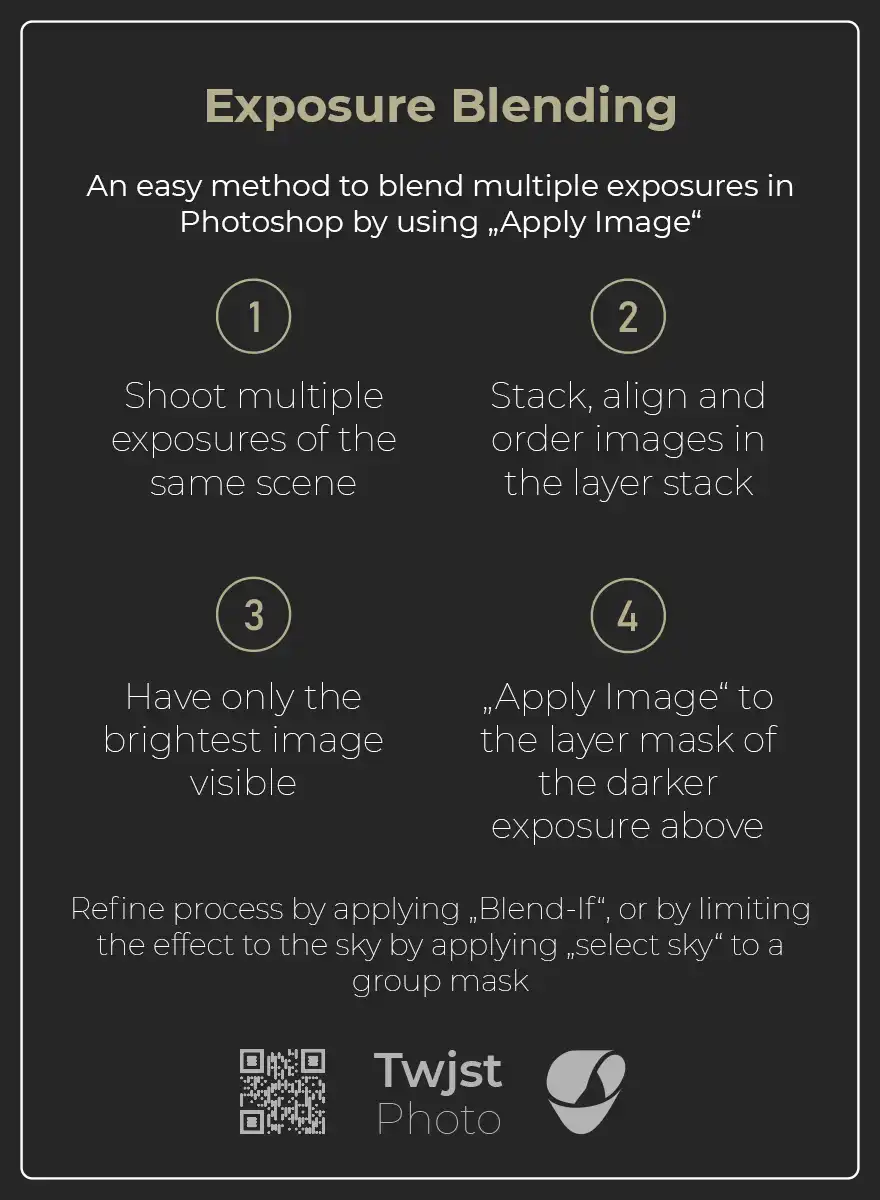
You can download a jpg version of the cheat sheet right here. If you want to learn about the “Apply Image” command, you can read on the “channel calculation” section at Adobe. Unfortunately, it does not say a lot about what the function is exactly doing.
If you like this tutorial, please let me know in the comments below.
Did you like this Tutorial?
I hope it proves useful and you can take something with you. Let me know below if you have any questions, comments, or suggestions – or share directly on social media.

Hi, thanks for this tutorial.
I tried this on my photos and when i do, I have very strange results( sort of black and Gray pixels on my photo). Do you know where i fail?
Thank you
good
Great the way you don’t assume a reader is already going to know half of those steps. I shoot a lot of things indoors that are progress over months, underway in workshops so I don’t get to have a say in lighting, clutter, and so on from session to session. It is “as-it-happens” documenting. My Sony a7III has a few Blending modes but I have not tried them yet. I’ve been rolling my shutter and aperture wheels with my fingers as I click away to get random bracketing on occasions.
I shoot mid-range (under 200m maximum distances) landscapes for my own interests and this will definitely be of use in those scenarios too. Thanks so much!