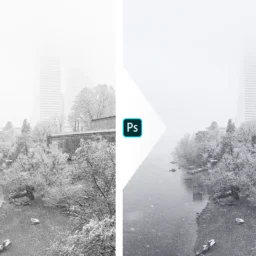
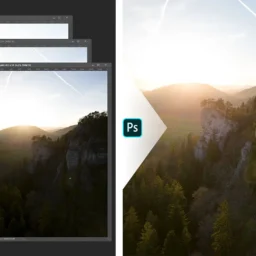
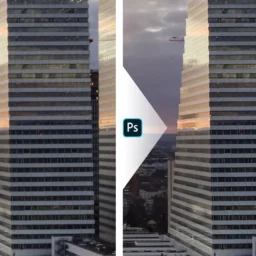
Tutorial: How to stack images for a long exposure photograph in Photoshop
In this tutorial, I’ll show you how to stack images in Photoshop CC 2020 to get an artificial long exposure result

Introduction
Hello there fellow photographer! “Combining images for an artificial long exposure? Why would anyone want to do this?” – I hear you asking. Well, there can be a couple of reasons.
- You forgot your tripod and took a series of images instead
- You want your long exposure to be super long, but did not want to expose 10-20 minutes in camera, but rather minute long shots
- You are – like me – using a drone which can only shoot so long before camera shake is introduced
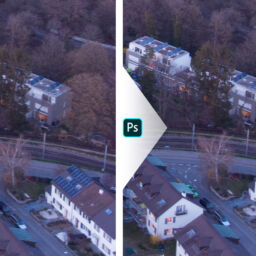
There is a fairly simple way to stack images in order create an artificial long exposure in Photoshop. For drone photographers like me, this offers an opportunity which I don’t have otherwise. Image stabilization in drones can be amazing! With my Mavic Air I can usually get shots up to 1 second without any camera shake – try this manually! But this is as far as you can get, try to take a longer exposure and your yield of usable images will drastically decrease. What to do? I take series of images, each 1 second long and combine them to a single long exposure picture.
Here are the steps you need to follow
At the end of this post, you can find a free cheat sheet to remember the technique!
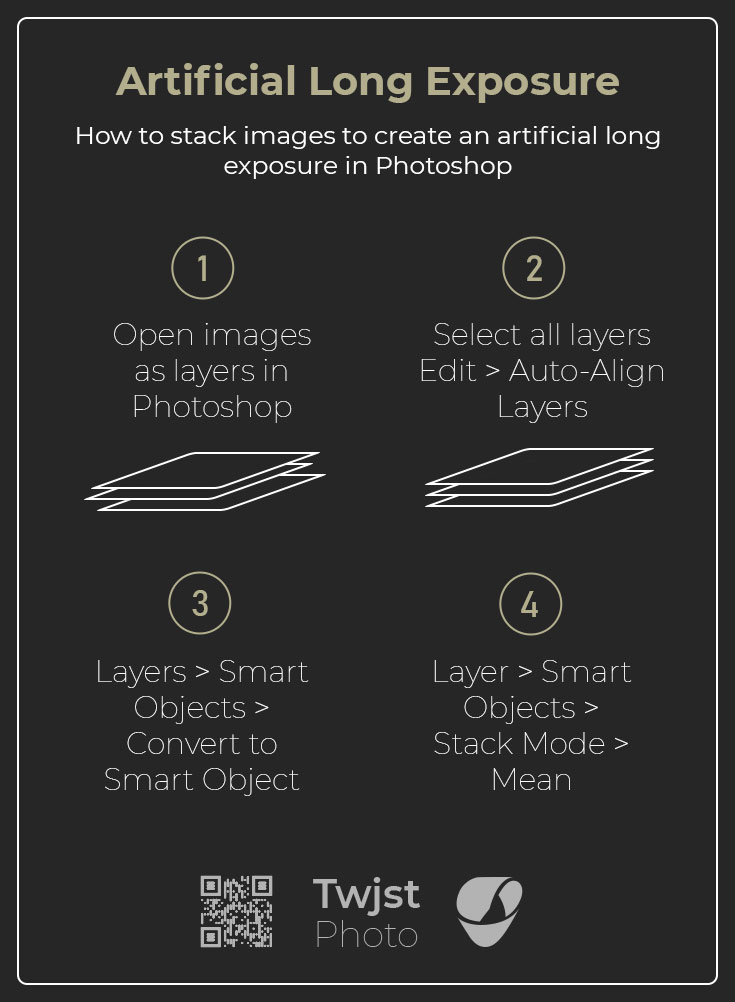
- In Lightroom you can select them and choose “edit in photoshop as layers”
- OR open them individually in photoshop and stack them as layers
- OR Copy / Paste the images directly
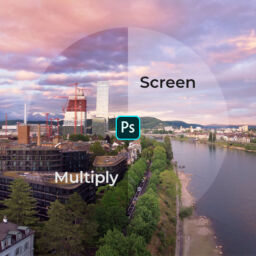
- Select all layers
- Choose Edit > Auto-Align Layers
- Leave projection on “auto” and hit “OK”
- With all the layers still selected:
- Choose Layers > Smart Objects > Convert to Smart Object
- OR right click one of the selected layers and choose “Convert to Smart Object”
- With the Smart Object Selected
- Choose Layer > Smart Objects > Stack Mode > Mean
🎉Tadaaaa, there you go. You are most welcome 🙂 Now go and try it yourself! But before: grab the cheat sheet below and make sure to leave a comment!
If you want to read about image stacks from the official side, you can find the Adobe Photoshop Guide help here. Are you someone who likes to have a cheat-sheet? I have just the right thing for you, for free. In case you post it somewhere please make sure to credit twjst.photo. See you next time around!
Did you like this Tutorial?
I hope it proves useful and you can take something with you. Let me know below if you have any questions, comments or suggestions – or share directly on social media.