Edit in Lightroom only with profound effects
In this Lightroom editing workflow tutorial, I will show you how I edited one of my photographs with the goal to emphasize the already present light in the scene. Wait, you do not have Lightroom? No worries, the concepts that I am using should be available in one form or another in any image editing software.
I showed the image used in this tutorial for the first time in this blogpost. All I used for the edit was Lightroom, nothing else was required. All in all, it is a bit lengthier than this earlier workflow blogpost on how to enhance the light mood, so if you think this one is a bit too complicated check that one out first.
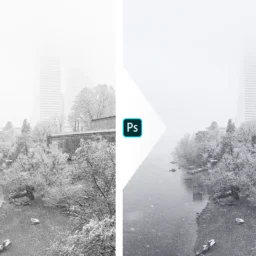
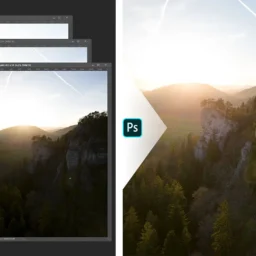
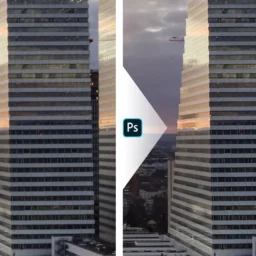
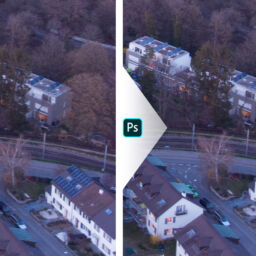
Below you can use the sliders in the before and after images to see the difference. Would you have taken the same route – or a completely different one? Is there something you can teach me? Please be so kind to leave a comment below the blogpost!

Preface
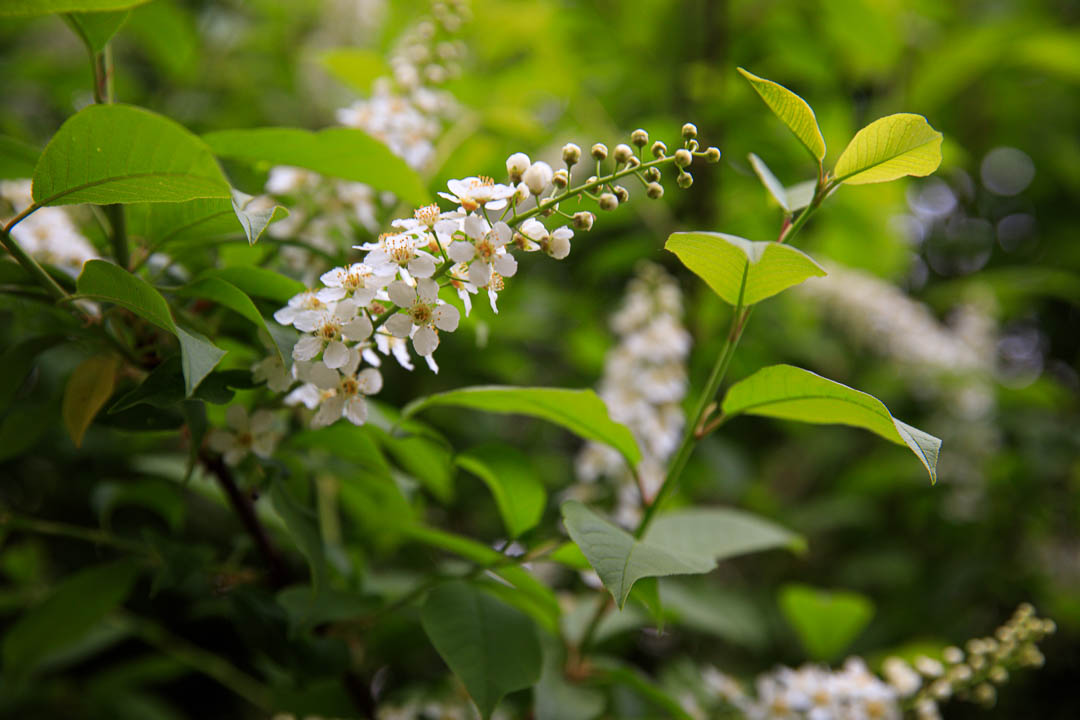
In my earlier post I described how I struggle to see the light, that I am still finding out what this actually means and that I’m currently practicing seeing it better to use it in my photography. So, let’s have a look at the original and analyze what is on there.
Original Image: Seeing the Light in the Scene
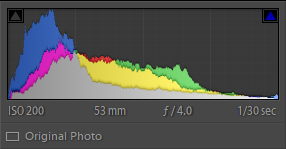
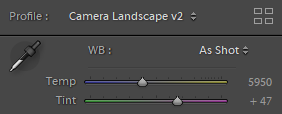
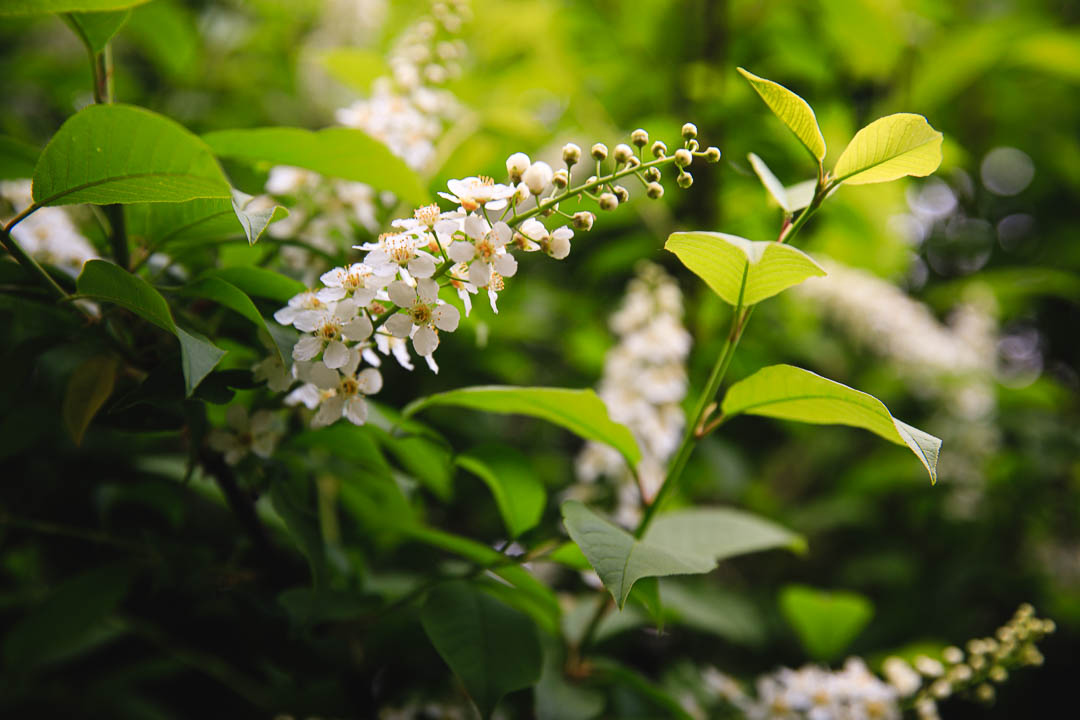
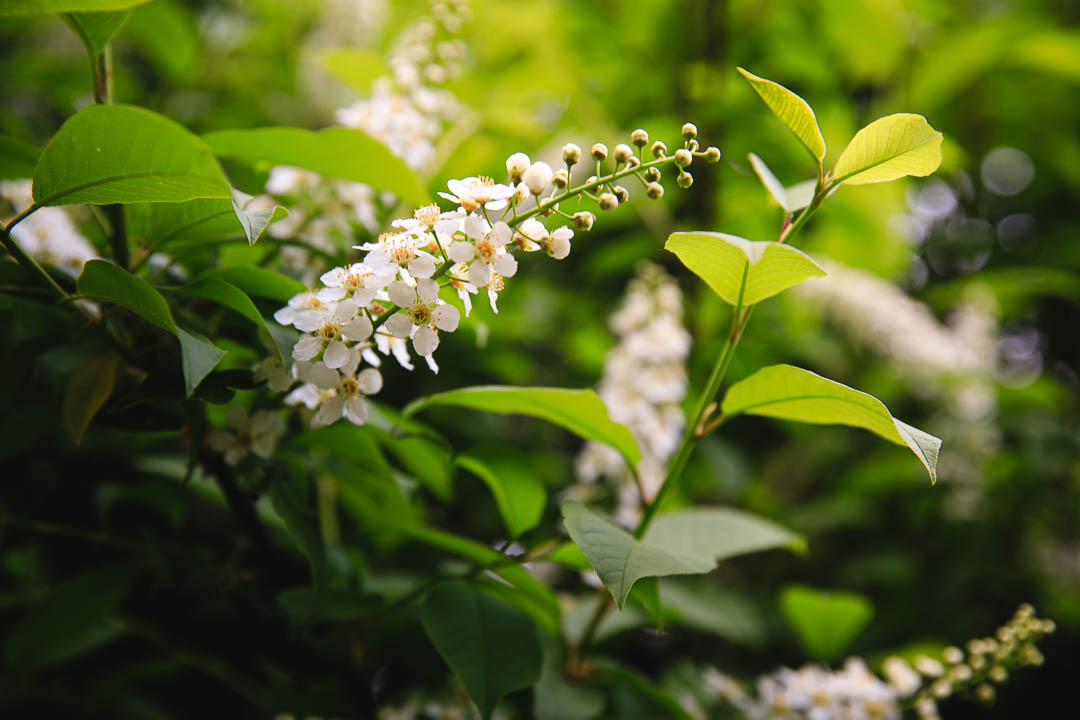
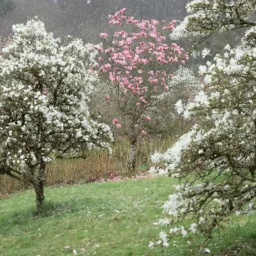
Exposure wise the image seems fine, maybe a little on the bright side. Details in both light and shadow should be fine. I select the camera landscape profile because I find it brings out the greens better for this particular image. And notice the white balance set by the camera which I find rather on the cold side for this scene.
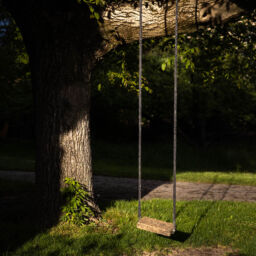
First, it is a small and intimate scene, a part of a bush in bloom, not larger than 20 x 30 cm. The sun shines through the bush from the top left and is illuminating one branch with flowers and the top leaves of a branch next to it. Already when I took the image it was clear to me, that the leaves on the right branch would be the subject of this image, the flowers leading your eyes to it. The light is soft and warm, and the greens of the bush are saturated and bright – as they are often in spring when the leaves are still relatively young. I photographed at an aperture to get enough depth of field to have the subject in focus while still making sure to get a soft, non-distracting background.
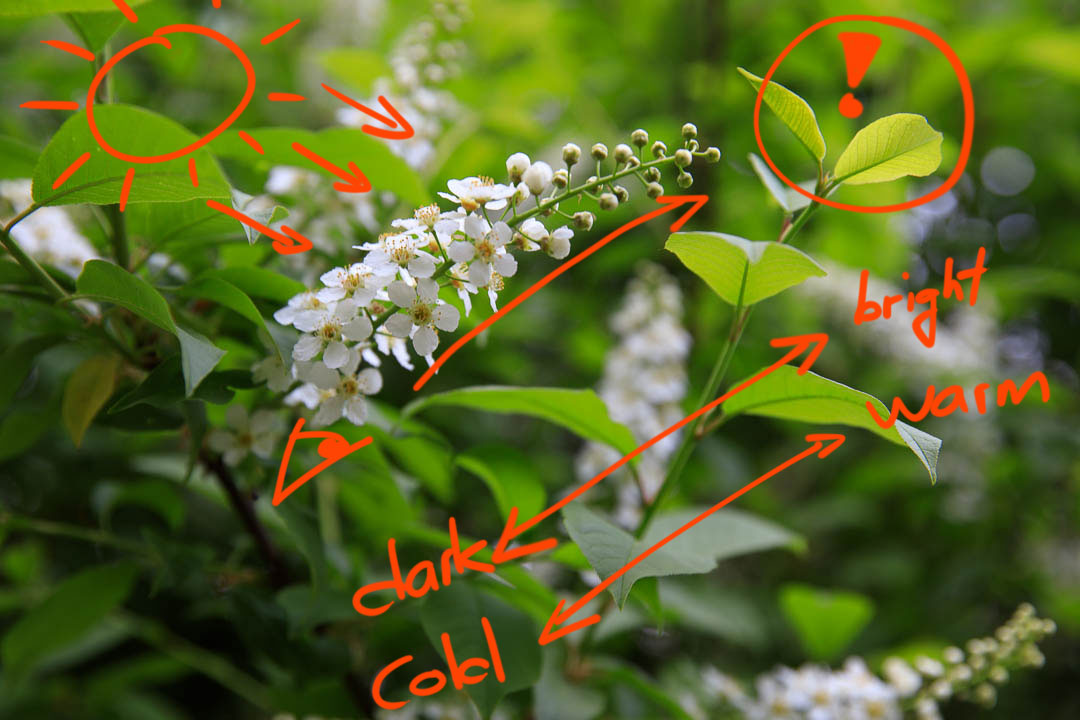
Now, let us have a look what kind of transitions are already present in this image as a basis of what we can emphasize. The strongest one for me would be from dark to bright from the bottom left to the top right. Then we have rather cool shadows with some warmer highlights, especially on the top leaves of the right branch. Let us keep this in mind when we edit the image, because my idea is not to create something completely different, but to emphasize what is already there.
My idea is not to create something completely different, but to emphasize what is already present in the scene
Basic Adjustments

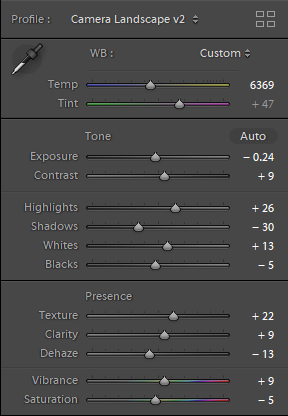
Basic adjustments can already make a big difference. Starting with the white balance, I warm it up significantly to match the warm light that was there in the scene. Then I increase contrast with the exposure edits: highlights and whites up, lower shadows and blacks.
And while I increase texture and clarity to have more crispiness on the leaves, I also went negative dehaze. I find myself using the dehaze mostly negative when trying to create mood and depth.
Camera Calibration
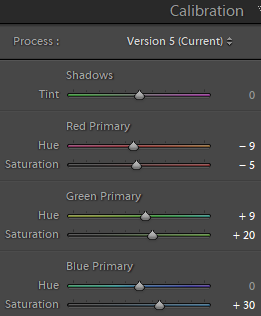
The next thing I do is to go all the way down to the camera calibration. Unfortunately, I cannot tell you what this panel exactly does, but it can have significant impact on the colors of an image. When done right you can get the color and mood much better than with any other panel in Lightroom.
The goal for me here is to bring forward even more the warm light shining through the leaves and bring forward the greens of the foliage.
Curve

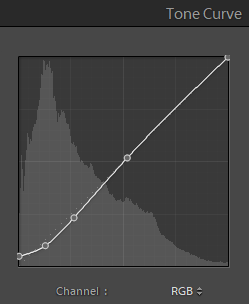
Next, I use the curve to finely control contrast where I want it to. Besides further lowering the shadows I also “mute” the blacks by bringing up the lowest point. This has an interesting effect: There are no true blacks anymore and the contrast in the lowest shadows is gone. In my eyes this further emphasizes the light present in the scene.
HSL


Then I use the HSL panel to shift the color more towards green an brighten the main warm tones. With this I achieve more juicy greens and the white flower petals are a bit more neutral.
Gradient Filters
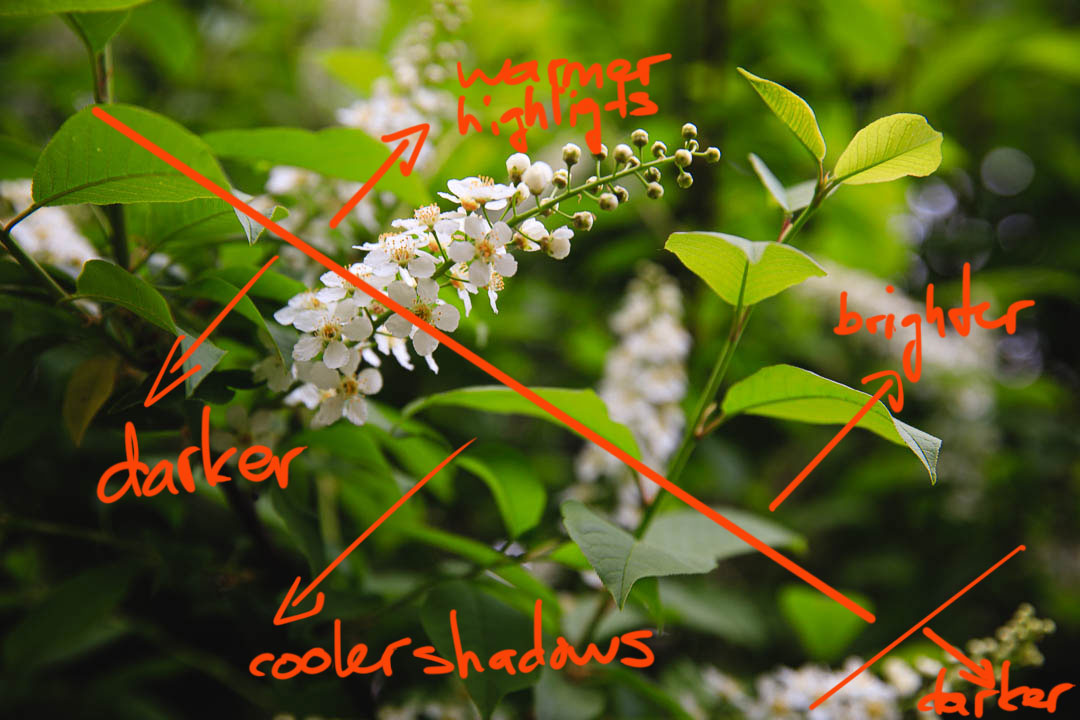
Now to the local adjustments, this is where it gets fun for me: with gradient filters I try to emphasize the transitions from dark to bright and from cool to warm. The transitions both are from bottom left to top right.
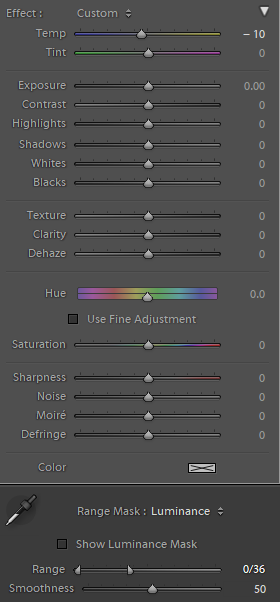
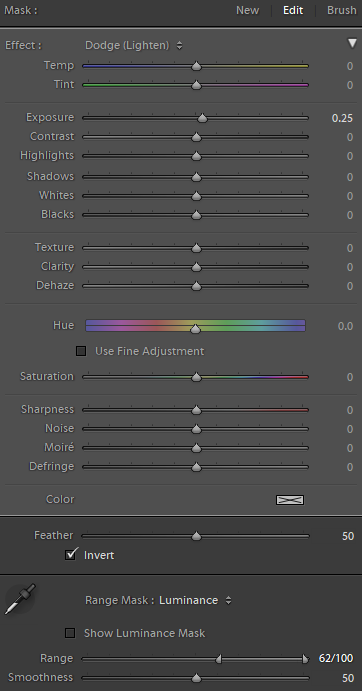
I darkened from the middle to the bottom left, and in addition cooled the shadows there – the adjustments you can see depicted here as an example. Notice how I only cooled the darks using a luminosity range mask. Then I brightened from the middle to the top right part, and in addition I warmed the highlights further. I also darkened the very bottom right corner to make sure it would not distract too much.
Final Local adjustments
Now there are only a few last finishing touches needed.
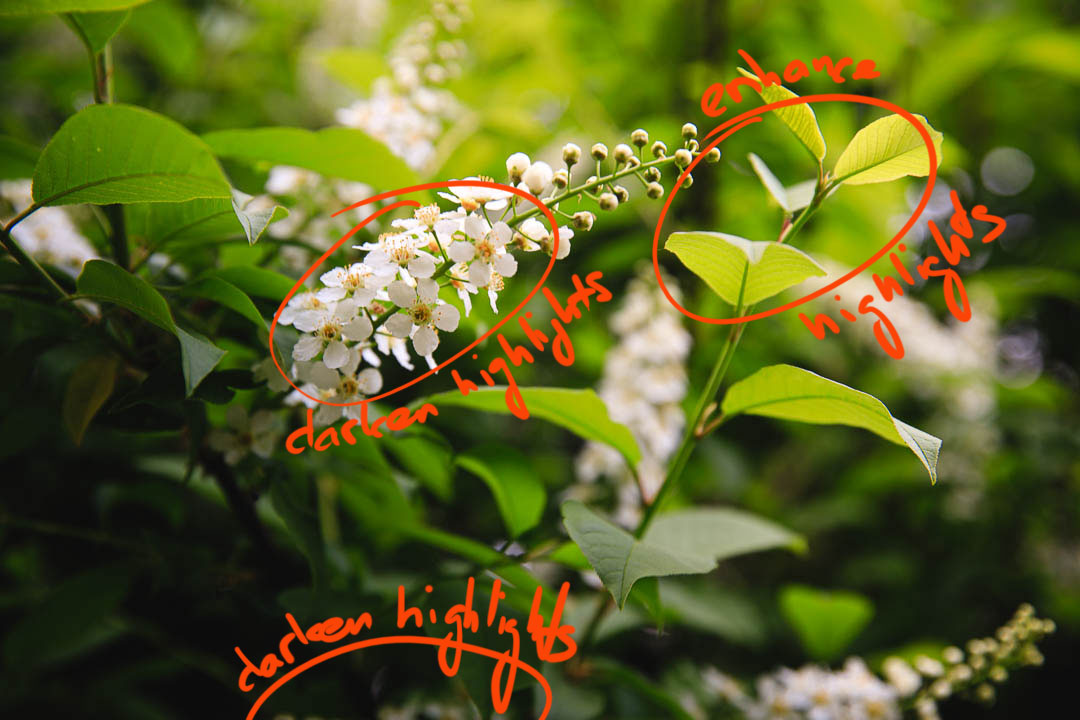
At first, I want to make sure the flower petals in the image would not steal the show of the main subject: the leaves to the right of it. Also, on the very bottom, there are some highlights which I wanted to tone down. And second, I wanted to make sure the main subject stands out by further enhancing the highlights and by separating it a little more from the background.
All this I achieve with local adjustments which are immensely powerful in Lightroom. The bottom highlights by using a brush adjustment darkening the exposure, then the flower petals with a radial filter. To make sure I only affect the flower petals I use the luminosity range mask. The same goes for the leaves on the right: a radial filter with a luminosity range mask to brighten the highlights further (those are the representative settings shown). And a second radial filter darkening the shadows behind it. Like this the main subjects stands out even more.
Final thoughts
This is my whole Lightroom workflow for this image. I hope you agree with me, that
- The final image looks better than the unedited one 😀
- That I did not construct something unnatural, but rather enhanced the light that was already present in the scene
Edits like this are no invention by be, I am heavily influenced by many articles and videos on the internet. Currently a big source of inspiration is the Expressive Photography YouTube Channel by Alister Benn, I highly recommend his “Compositional Consequences” series and also if you have a bit more time the “Vision and Light” series where he is talking to other top landscape photographers.
Do you like this Workflow?
I hope it proves useful and you can take something with you. Let me know below if you have any questions, comments, or suggestions – or share directly on social media.

Thanks for the shout out, I really appreciate that, and I like the way you’ve explained all the key points of transitions and engagements.
Thanks a lot for the kind words Alister. Without all your tutorials I would not have been able to get to this result – let alone take the image in the first place. All the best to you!
Ein ganz tolles Bild ist dir da gelungen! Lustigerweise ist für mich die Blüte das Hauptmotiv und nicht die Zweigspitze. Das wäre wohl der eine Punkt, wo ich selbst bei der Bearbeitung in eine andere Richtung gegangen wäre 🙂 Ansonsten hätte ich das mit Licht und Schatten sicher ähnlich gemacht. Das unbearbeitete Bild ja schon toll aber durch dein Edit wirkt es noch viel mehr. Mir gefällt auch die Art, wie du dein Tutorial geschrieben hast. Die Vorher/Nachher Slider sind super und mit deinen handgeschriebenen Notizen kann man sehr gut nachverfolgen wo du etwas angepasst hast. Auch ist immer ganz klar, warum du etwas gemacht hast und was dir dabei wichtig war. Da kann man ja auf weitere Tutorials gespannt sein 😉 Liebe Grüsse, Nadia
Vielen Dank meine Liebe 😘! Dass du dir die Mühe nimmst mir so einen langen und differenzierten Kommentar zu schreiben bedeutet mir viel. Dass die Blüte meinem Hauptmotiv konkurrenz machen könnte war mir klar – deshalb habe ich auch etwas Helligkeit und Kontrast rausgenommen. Für mich sollte sie das Auge des Betrachters zum Hauptmotiv leiten. Aber sie ist immer noch der hellste Teil der Szene und stiehlt meinen Blättern wohl noch etwas die Show 🙄. Mit einem anderen Hauptmotiv wäre wohl auch das Edit ein anderes, und das ist natürlich völlig legitim. Auf alle Fällte freut mich, dass dir der Aufbau des Tutorials gefällt und du etwas damit anfangen kannst.