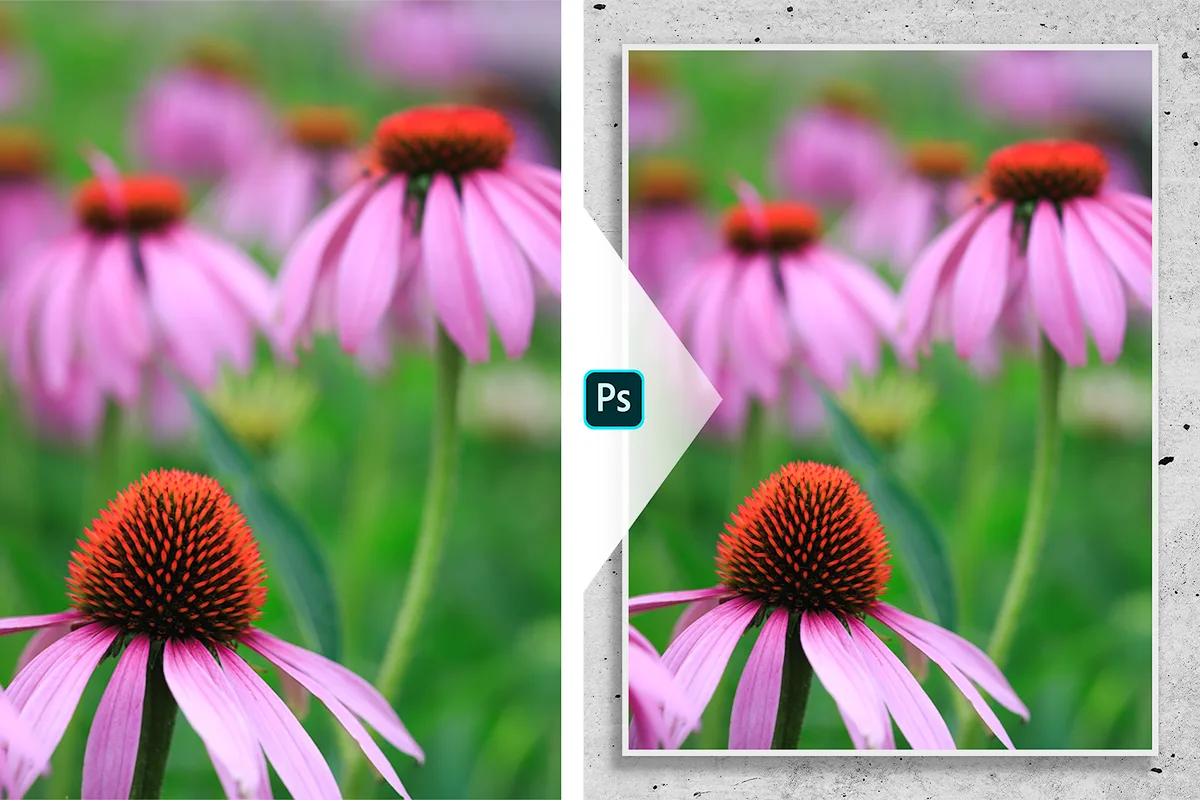
Tutorial: Make your images look like framed prints on a wall
In this tutorial, I’ll show to you one option how to create a very simple imitation of a picture frame in Photoshop CC 2022. This will make your images look like they are printed and framed on a wall. And it’s not hard at all!
Introduction

Hello there fellow photographer! Wouldn’t you want to have your images printed and framed on a wall? That’s of course a possibility, however likely not feasible for all your images. Some images just don’t have the resolution actually needed for a print, or it is just too expensive to print them all. And sometimes, you just want to create something a little more special for social media.
In such a case, we can imitate a picture frame in Photoshop, and make your image look like it hangs on a wall. This is what I use all the time when I want to present my images in a different style on Instagram.
There are other methods, but they will be part of another blogpost.
This post is a bit different than my other Photoshop tutorials. As usual you can get a cheat sheet with 4 steps at the end of this blogpost. However, the description goes more into detail, with screenshots taking you along the way.
Detailed Step by Step
Table of Contents
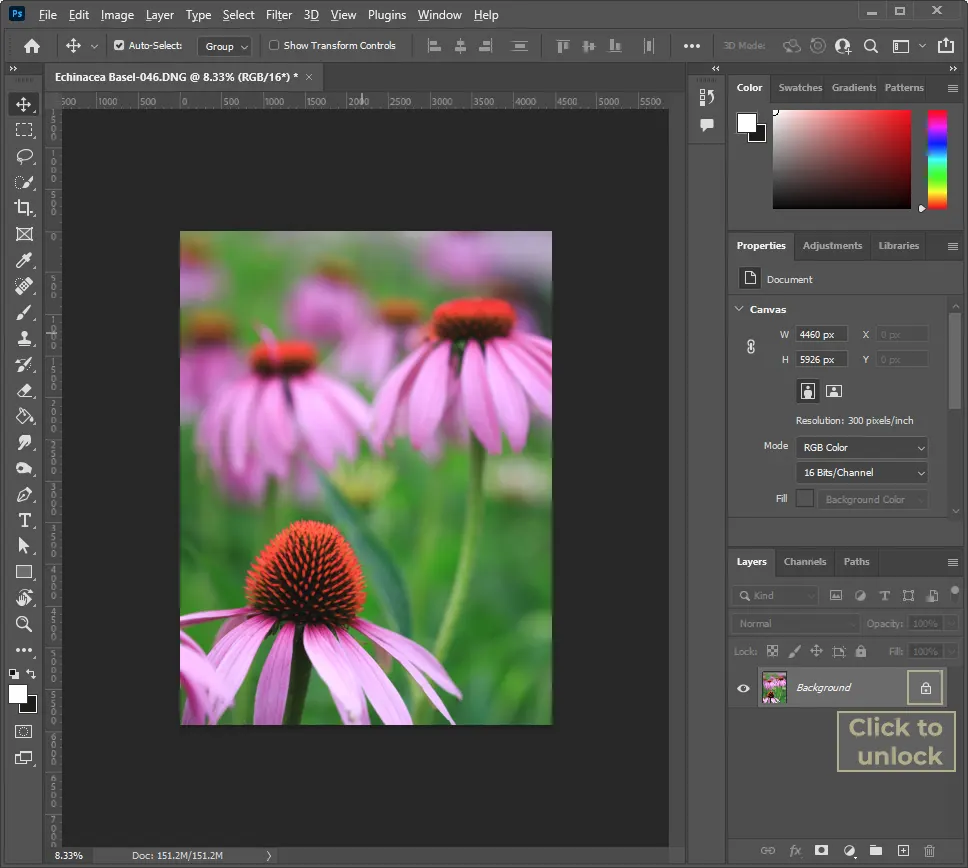
Step 1 – Open Picture
First, open your image in Photoshop. In the layer stack there is a new layer with our image. If it shows a lock, make sure to click it to unlock.
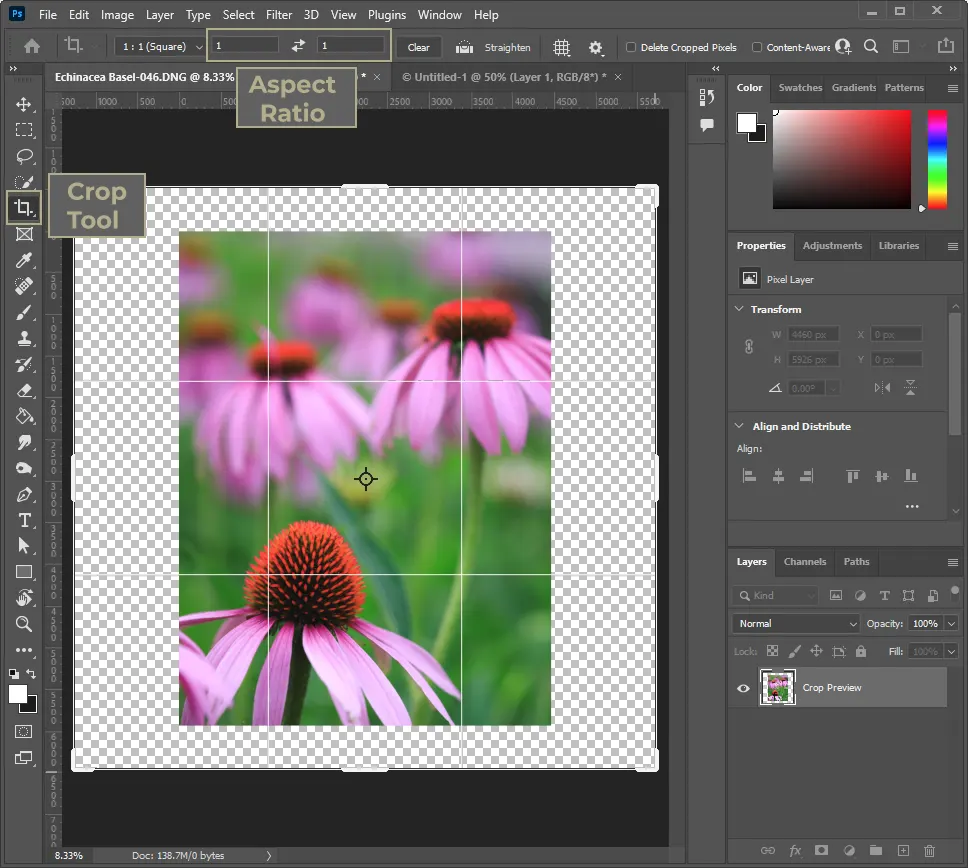
Step 2 – Enlarge Canvas
Then, enter crop mode by pressing “C” on your keyboard. In the settings of the crop tool. In the settings of the crop tool, you can enter a desired aspect ratio of the final image (I often use a square for my Instagram images).
Then, enlarge the frame while holding the “Alt” key. The effect of the Alt key is, that the frame gets enlarged from its center, and so you will have even spacing around your lovely picture.
When you are happy with the size, accept the changes by pressing “Enter”.
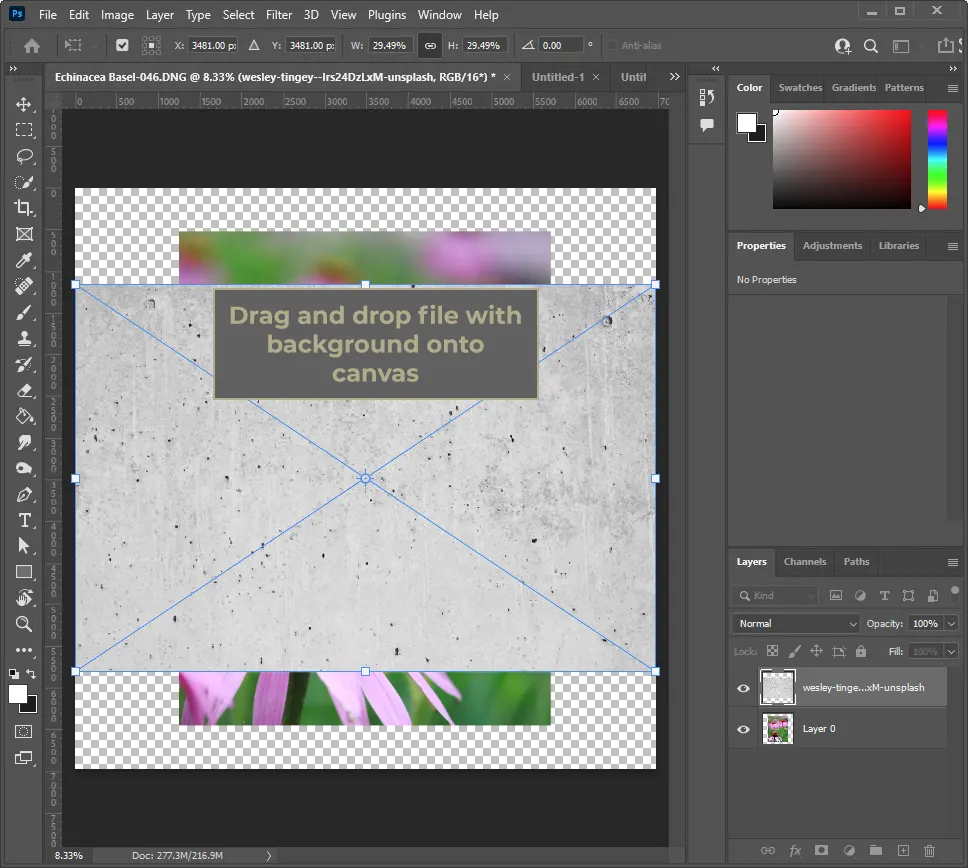
Step 3 – Add Background Image
Now, drag and drop a background image onto the canvas. I downloaded a couple of free wall images from Unsplash. You can find links to my favorite three backgrounds further below.
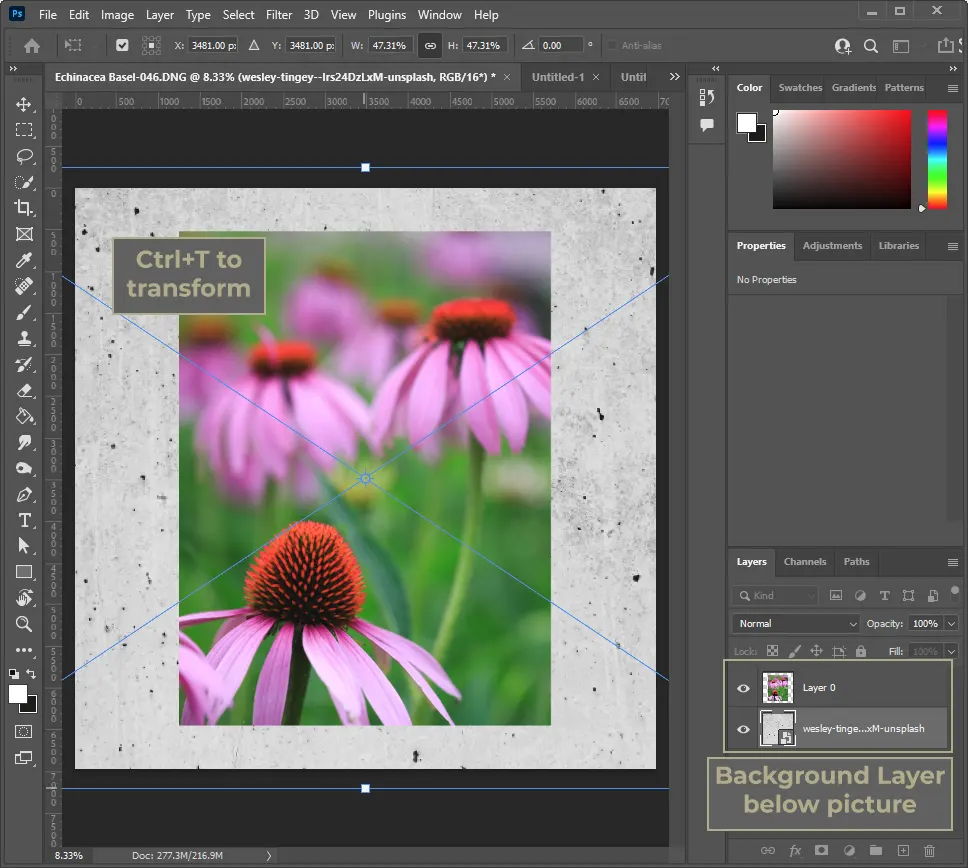
Step 4 – Resize Background
Next, make sure the layer of your background image is selected and move it below your picture layer. Then enter “transform”-mode by pressing Ctrl+T. Now enlarge it so it covers the whole background.
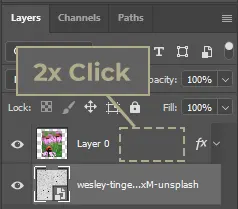
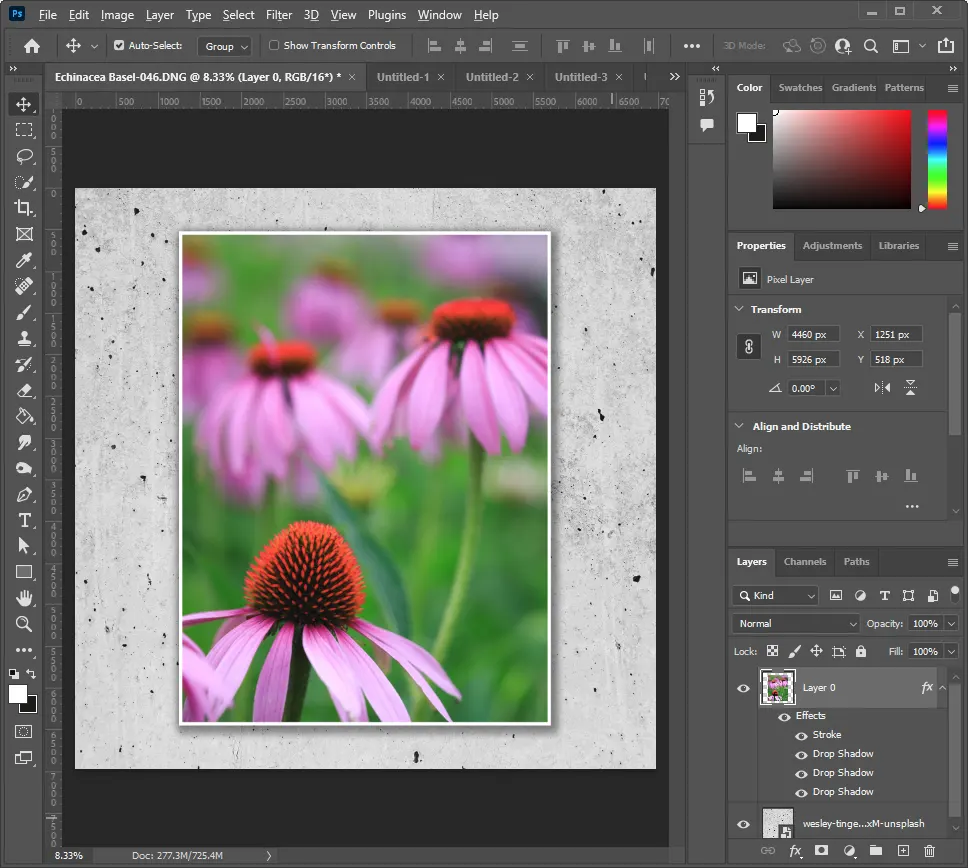
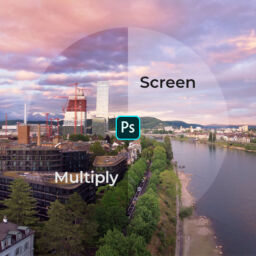
Step 5 – Open Layer Style Dialogue
Finally, we need to create the picture frame and add some 3 dimensionality. Double click on the right side of your picture layer. This will open the “layer style” dialogue.
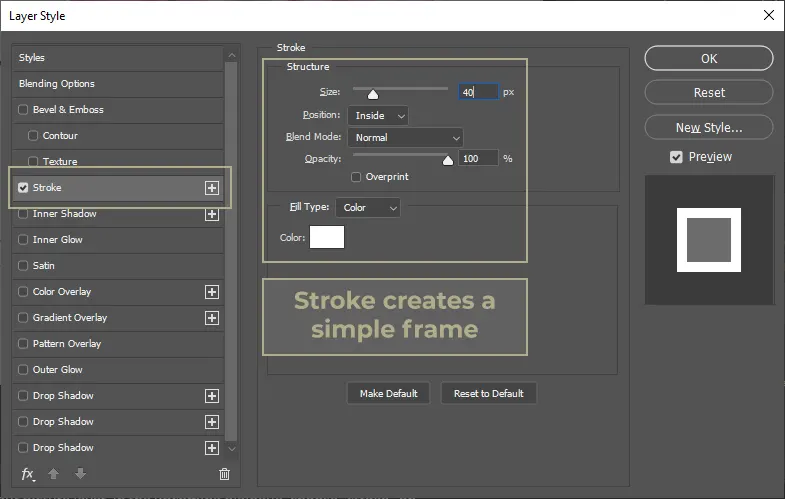
Step 6 – Add the Frame
And here come the special effects which allow us to imitate a frame! In this dialogue, choose “stroke” on the left-hand side, which will add a simple frame around your image. You can now change the width of this frame and the color to your liking.
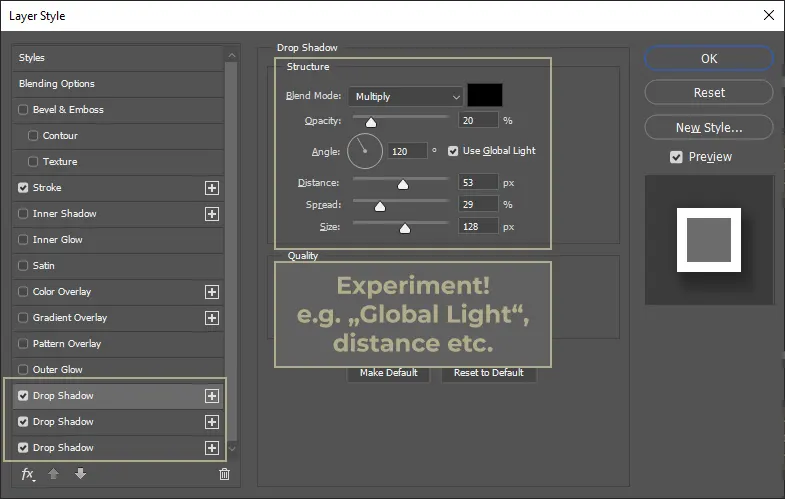
Step 7 – Add Drop Shadows
All that is left is to add drop shadows to your framed image, which will create the illusion of depth. One of them can work just fine, play around with the settings until you like the result.
Usually, I add multiple drop shadows with slightly different settings. To me, this can make the result look more natural. If you want to give this a try and don’t see multiple drop shadows in your dialogue, just press the “+” sign next to it to add more of them. Play around to find what you like best.
You could stop at this point
That’s pretty much all that there is to it, you successfully imitated your picture being framed on a wall! While this description looks like a long process, if you go through it a couple of times it should only take you a couple of minutes.
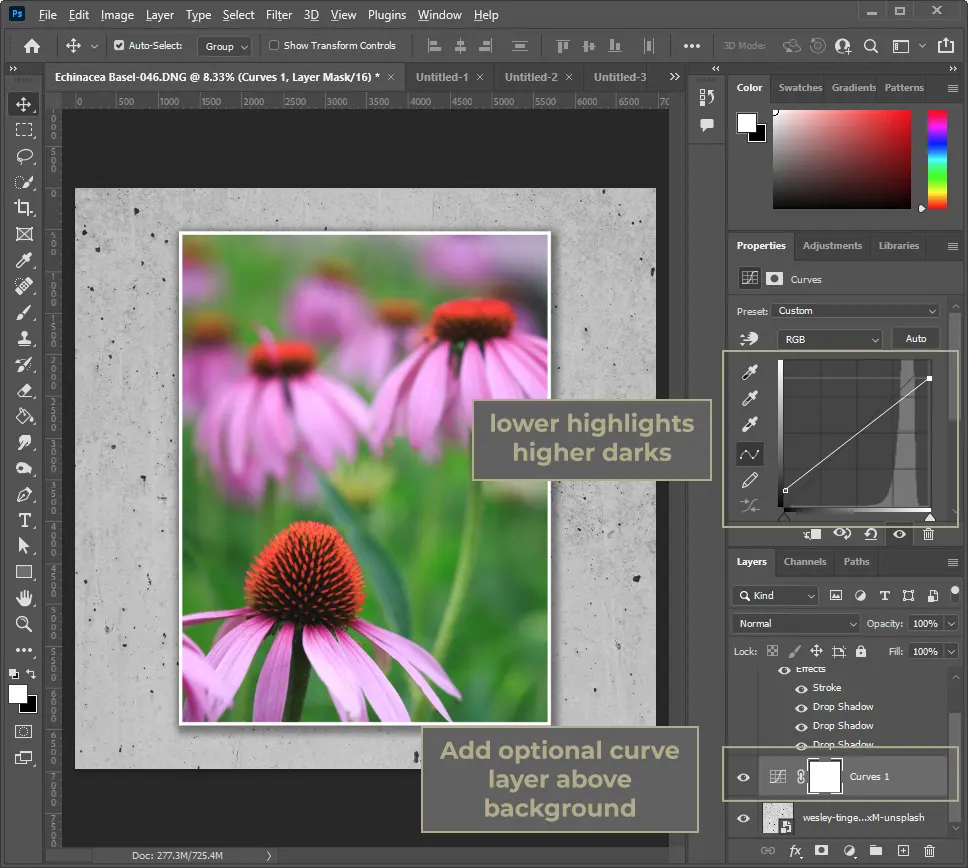
Bonus Step
A tip for the very end: if the background appears too bright compared to your image, you can add an adjustment layer above the background and change it accordingly. I tend to use a curves adjustment and take down the white point and up the black point. Sometimes, this gives your image a bit more impact.
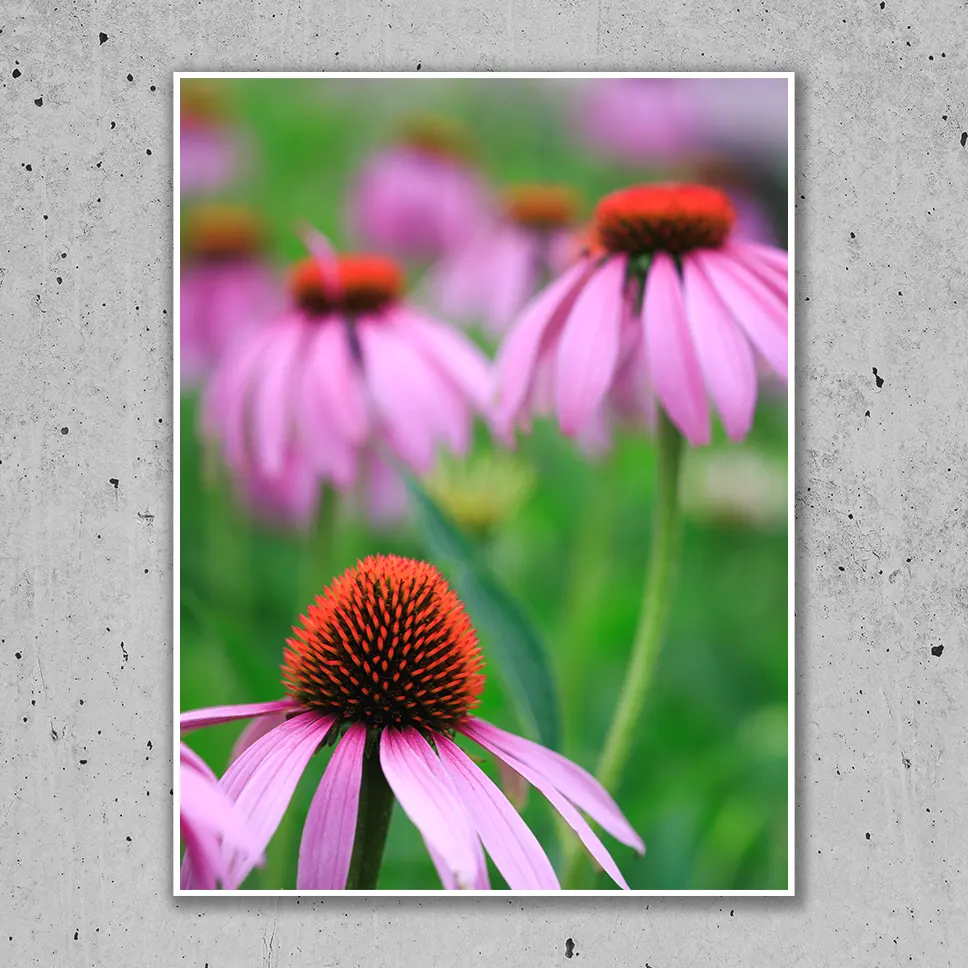
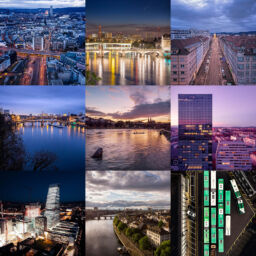
Final Result
And this is the final result! I hope you like it and find you useful for your own purposes. There are of course many other things you can try to make it more believable, more 3D etc. If you want to get to know all the options, you can have a look at the Adobe Photoshop help page about layer effects and styles. However, I find especially for social media, nothing more is needed, and the result is just fine.
Please let me know anything you find useful, feedback or other ideas below in the comments!
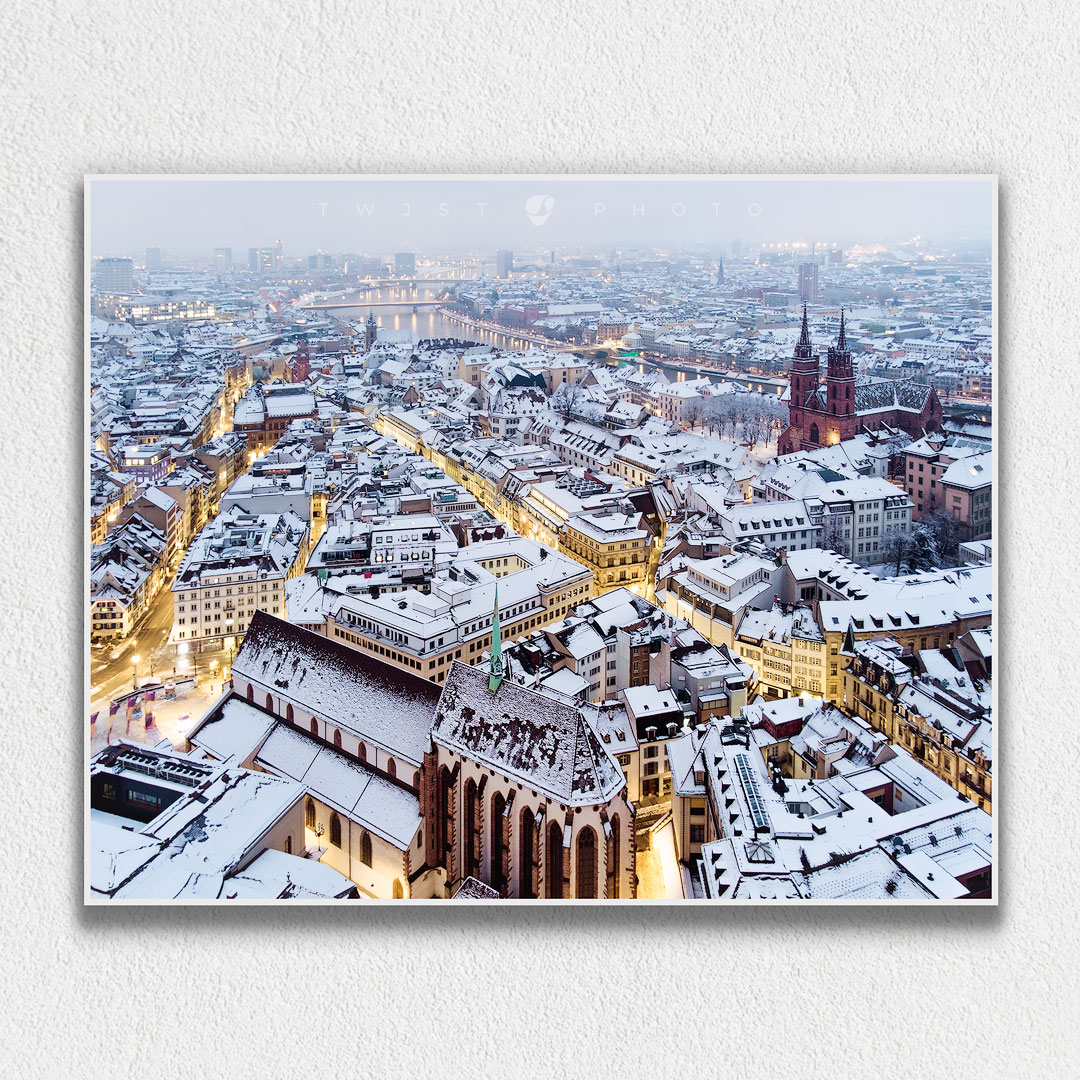
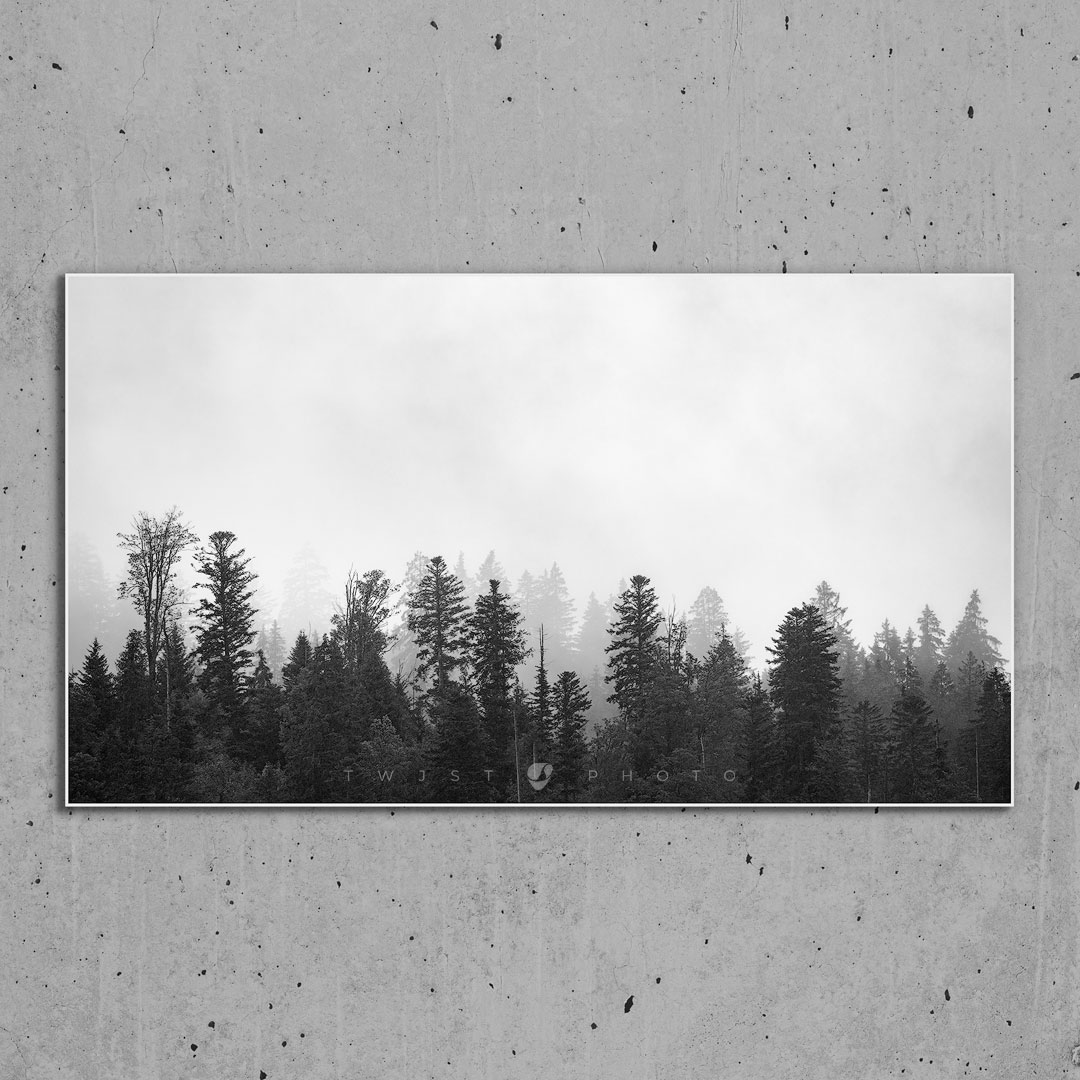
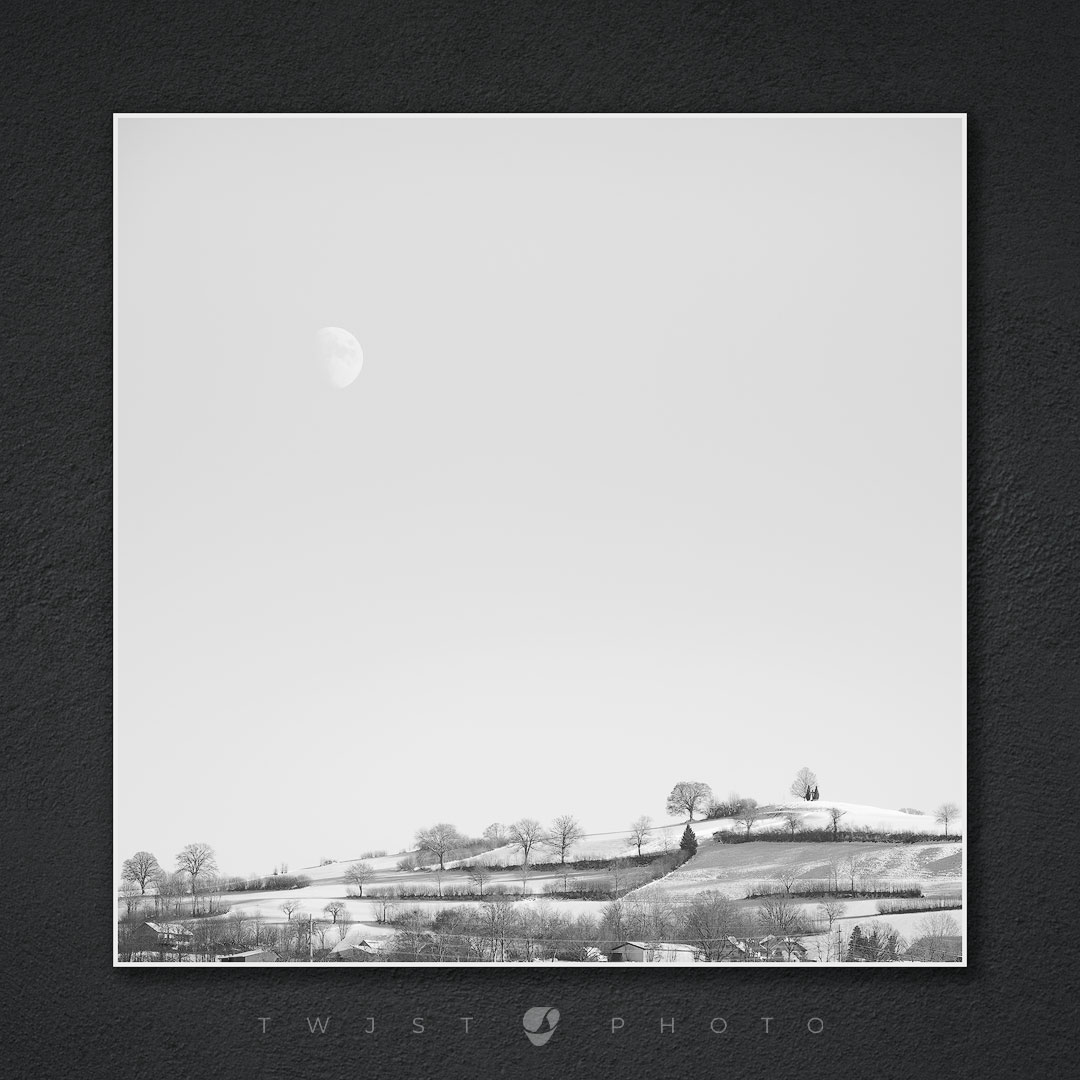
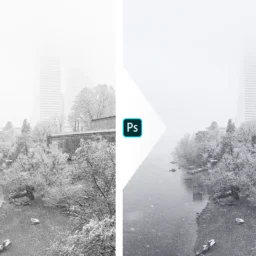
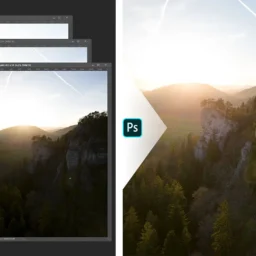
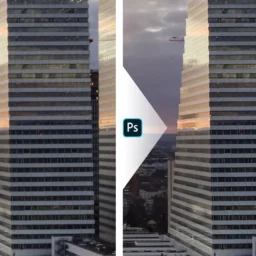
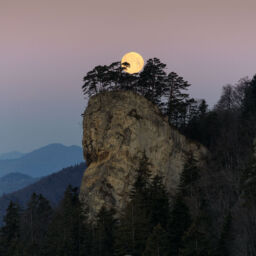
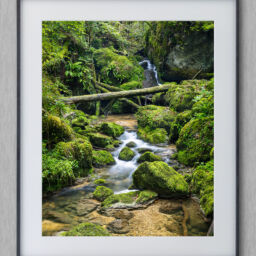
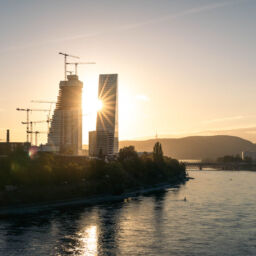
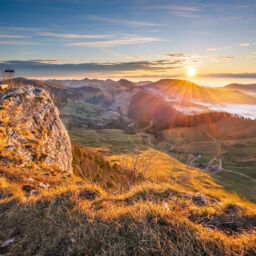
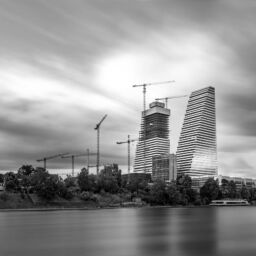
Inspiration
Below you can find three images from my Instagram where I used different backgrounds with the technique described above. In addition to a link to the corresponding post, I also added a link to the Unsplash Background used for the particular image.
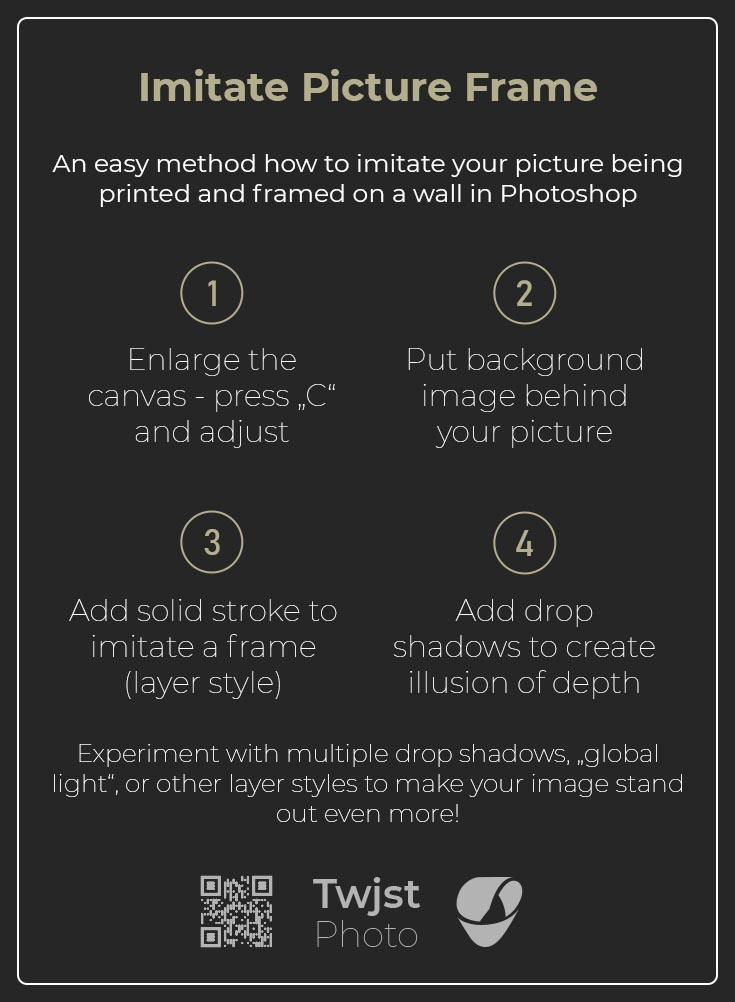
Cheat Sheet
🎉Tadaaaa, there you go. You are most welcome 🙂
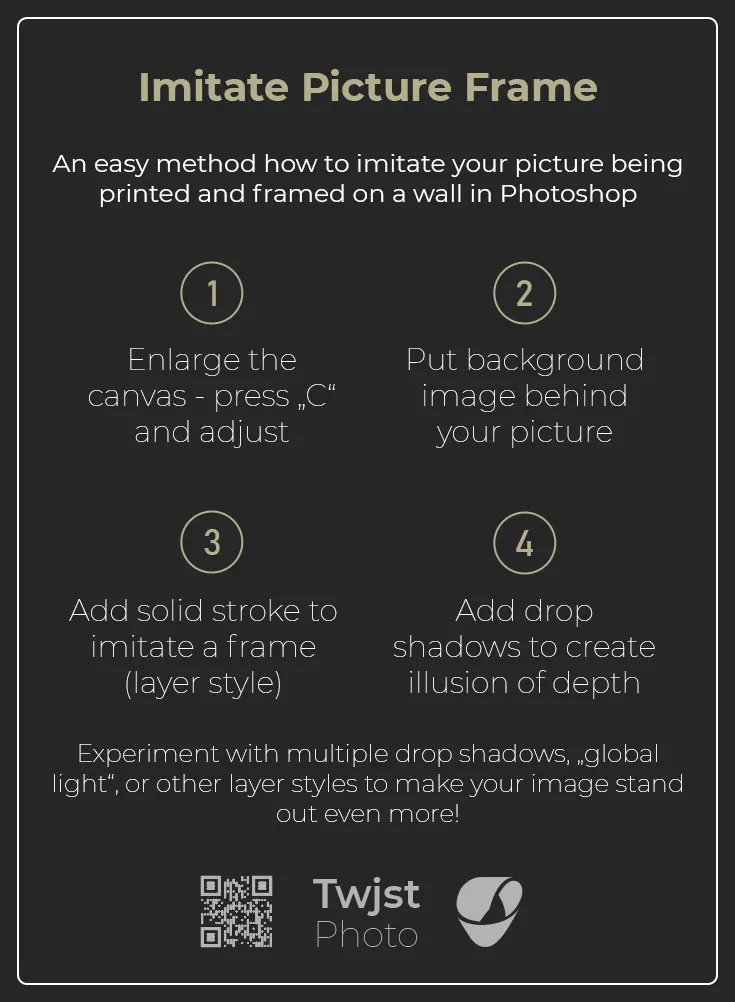
You can download a jpg version of the cheat sheet right here. If you like this quick tutorial, please let me know in the comments below.
Did you like this Tutorial?
I hope it proves useful and you can take something with you. Let me know below if you have any questions, comments, or suggestions – or share directly on social media.
