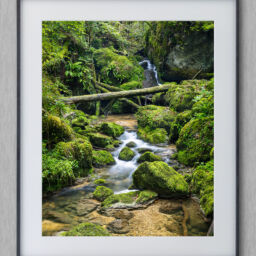
Tutorial: How to Photograph Flower Close-Ups
In this tutorial, you will learn how I photograph flowers, leaves and grasses as soft and dreamy close-ups. The main part is achieved in camera, while editing in Lightroom and Photoshop can help to take the image to the next level. I have a blogpost up, in which I presented a number of images of the type. If you have not yet seen it, I recommend you take a look.
Introduction
Hello fellow photographer! In this tutorial, I will take you through my workflow for capturing stunning close-up shots of flowers, leaves, and grasses. While this may not be the only way to do it, it’s the one that has repeatedly yielded the results I like: clear subject separation, a buttery smooth background, and a soft, dreamy mood.

First of all, a summary of what we are going to achieve
- Capturing one or more flowers or plants as the main subject
- Creating a soft, blurry background
- Achieving a dreamy, soft mood
Let’s get it started!
Workflow
Let’s start with the workflow first, it’s easy enough to follow along. If you wonder why certain things are done they way they are, you can find explanations for different technical aspects further below.
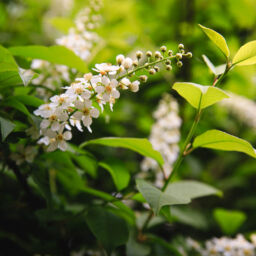
Finding your Subject
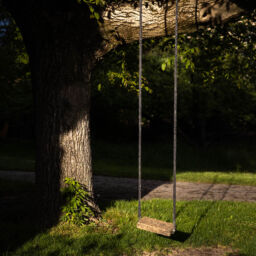
Find a subject! I prefer flowers that are somewhat separated from their surrounding. For example, in a garden with many flowers, search for one which is slightly taller than the surrounding ones.
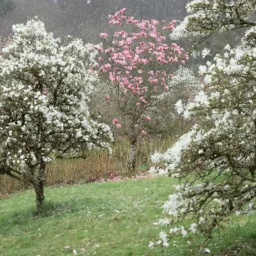
The following image is not particularly good, but demonstrates nicely how a flower can outgrow others around it. By choosing the right angle, you may be able to completely separate it from its surroundings. Alternatively you can use the the fact that there are so many similar flowers around it in your composition.
Soft Light / Shade
It’s often more pleasing if you don’t have direct harsh sunlight on your subject. If it’s an overcast day this should not be an issue. Alternatively, the subject could be in shade. And if this is not the case, you can also bring our own shadow. Either through some cardboard, your backpack or literally by yourself. Once you have found a flower or a plant as your subject, here is what we are going to do.

(Com)Position – finding your background
Get your camera low, maybe even on the ground. Zoom in considerably and get close to the subject. How much you can zoom and how close you can focus will depend on your setup. Find out the limits of your system and work with it.
Now have a look at your composition. While the subject is very important, pay attention to the background. Move your camera slightly around the subject, angle it up or down a bit, and you should notice how much the background can change. Find a good combination with a pleasing angle on your subject, and where the background is soft, as nondistracting as possible, and the colors are matching your scene.
Words, words, and more words. How does this actually look like in practice? To illustrate this, you’ll find three images of the same subject below, all straight out of camera with no edits applied. They were shot from a tripod to allow longer shutter times.
First image features wild garlic as main subject with the surrounding forest in the background. However, I found the two dark trees in the background distracting. So, first thing I did was open the aperture more, leading to the second image.

Canon EOS R
0.5 seconds | f / 5.6 | ISO 100
EF70-200 f/2.8L IS III USM @ 120 mm
The more open aperture gives a softer background. However, I still felt the tree on the right was too distracting and now the depth of field was very shallow. Therefore I adapted again, leading to the third image.

Canon EOS R
1/5 second | f / 2.8 | ISO 100
EF70-200 f/2.8L IS III USM @ 120 mm
For this image, I closed the aperture slightly to get a little more depth of field. But more importantly, I turned the camera just ever so slightly to the left. As a result, I eliminated the tree on the right completely from the composition.

Canon EOS R
1/4 second | f / 3.5 | ISO 100
EF70-200 f/2.8L IS III USM @ 120 mm
Often, I prefer my background not to include any sky since it tends to be too bright. If both land and sky are in the background, it tends to be too contrasty and distracting. My go-to is often to have other greenery in the background, which is as far away as possible to give better separation and softer colors.
(Com)Position – Use your foreground
Now we have a sharp and separated subject in front of a soft blurry background. One way to further improve the soft and dreamy mood is to shoot your image through some foreground. What do I mean by this? Remember, we have shallow depth of field, which blurs our background. But this is equally true for our foreground. If you have some leaves or grasses in the foreground, they will be blurred very strongly, which will soften the particular portion of your image and add a soft color cast to it.
First image is a scene of blooming grasses. It’s interesting, you can see a lot of details and the colors are very saturated. However, it’s also very contrasty, not very soft and certainly not dreamy. Therefore I adapted.

Canon EOS R
1/160 second | f / 7.1 | ISO 400
RF100-500 f/4.5-7.1 L IS USM @ 500 mm
Next I photographed from a lower angle with grasses in the immediate foreground. Those are blurred beyond recognition, functioning as a filter making the image brighter and softer. But the effect is too strong for my taste and the color of the background is off.

Canon EOS R
1/160 second | f / 7.1 | ISO 400
RF100-500 f/4.5-7.1 L IS USM @ 500 mm
And so for the final image I changed scenery by moving a bit to the left. The result is more dynamic, the background has a nice soft green and the bottom left part is held very soft by some elements in the immediate foreground.

Canon EOS R
1/60 second | f / 5.6 | ISO 100
RF100-500 f/4.5-7.1 L IS USM @ 343 mm
Take the Shot
Quick note about camera settings – more details can be found below: Open your aperture as wide as possible (lower number, e.g. f/2.8). If not enough of your flower is in focus, close the aperture stepwise until the result is better. However, note that this can negatively influence the blurriness of your background.
Once you have found your composition and dialed in your settings, take your shot! Or rather many of them 🙂.

That’s all there is to it. If you follow this recipe, I’m sure you will get similar images in no time. The rest of this blogpost is for all that want to know more. Why are we doing what we are doing and the technical details behind it. Keep reading!
Principles and Settings
Let’s have a look at the following scene, and imagine we stand on the left of it and photograph towards the right. Our subject is one of the flowers, but in the scene we will also have grasses in the foreground, and the trees and mountains in the background.
Going into principles and camera settings, let’s remember what we set out to achieve.
- Capturing one or more flowers or plants as the main subject
- Creating a soft, blurry background
- Achieving a dreamy, soft mood
What methods and tool do we have at our disposal to influence these aspects?
Influencing Subject Size and Depth of Field
First and foremost, when we want to get our subject big into the frame, we have a two ways of achieving this. First is getting as close as possible and second: using a longer focal lenght (e.g. a strong zoom). Both is going to support our second goal: a soft blurry background. The latter can be further enhanced by using a wide open aperture. Combining all these points will lead to a shallow depth of field. This means only a very small slice is going to be in focus (which should be our subject), while everything else is out of focus and blurry. You can of course overdo it and end up with a too narrow depth of field, but then you can always back up a little.
Below, you can find a more detailed explanations and diagrams depicting what each aspect contributes.
Focusing Distance
The closer you get, the bigger your subject is in the frame. This puts your subject front and center, it also eliminates potentially unwanted elements from your composition. At the same time, the closer your focusing distance is, the smaller the depth of field becomes.

Focal Length
The focal length determines your zoom level. The more you zoom in, the larger the subject appears in your frame. But the zoom level also influences your depth of field. If you are at the same distance to your subject and zoom in more, the depth of field will be more shallow, thus blurring out of focus elements more.

Aperture
The aperture is an opening between lens and sensor, which can have different diameters. Besides controlling the amount of light reaching your sensor, we can influence the depth of field, e.g. where the image appears sharp vs where it is blurry. A wide open aperture (lower number, e.g. f/2.8) will give a more shallow depth of field, while a closed aperture (higher number, e.g. f/16) will give a wider depth of field.

Other Settings
There are other settings which we need to take care of. They don’t necessarily influence the look of our image as much in this case. But they are still important to understand and take care of.
Shutter Speed
The shutter speed determines, how long your shutter is open letting light in. Choose a shutter speed which is short enough to prevent motion blur from occuring. If you are hand-holding, a good starting point is the inverse of your focal length. For example if you are zoomed in to 200 mm, use 1/200 second or shorter. Also consider that wind could make your subject move and you may have to further shorten the timing.
If your lens or camera have stabilization, this can help to achieve longer shutter speeds by compensating some of your own camera movement. However, it will not help if your subject moves.
This first image contains both motion blur and camera shake. The bumble bee is moving fast, and so its wings and also its body are blurred due to this. But then I also had a hard time keeping my camera still enough, and so there is a little bit of camera shake visible all across the image (best seen where the flower is in focus). Not the greatest image, I kept it solely due to the dynamics.

Canon EOS R
1/100 second | f / 5.6 | ISO 400
EF 100mm f/2.8 Macro USM @ 100 mm
The second image in comparison is much sharper and more clear. The bumble bee is not moving, but I also shortened the shutter speed from 1/100 of a second to 1/250 of a second. The ideal image would contain no camera shake whatsoever, but maybe some slight motion blur on the wings of the bee. But that’s of course personal preference and neither is just right or wrong.

Canon EOS R
1/250 second | f / 4.0 | ISO 400
EF 100 f/2.8 Macro USM @ 100 mm
ISO
Set ISO as low as possible while still getting a suitable exposure, e.g. your image is not too dark. The higher the ISO, the more noise is introduced to your image. How much will depend on your camera. For the soft and dreamy look we are going for, I find too much noise detrimental. Decide for yourself, how much noise you can tolerate. Or maybe you want to introduce some noise on purpose?
When Struggling with good Settings
If your situation does not allow this to work (e.g. it’s too dark), you can try using a tripod. With a tripod you can go for longer shutter speeds, as long as your subject is not moving. If that still does not work (not much light, stormy winds) consider fotographing something else and return later when the conditions have changed 🙂
Equipment
Let’s talk equipment and make it clear from the start: we can get images like these with almost any setup. Don’t get hung up on any of it, use what you have at your disposal.
As you have read above, you want to get as close as possible, zoom in as much as you can and have a wide aperture. Depending on your gear some of these aspects may limit the other, e.g. you can zoom in more, but the smallest possible focusing distance may be larger. If you have the choice, I would select better zoom over closer focusing distance. In my experience, this makes it easier to get smooth backgrounds.
Keep in mind that results will be much more up to you behind the camera than the equipment itself. Use what you have at your disposal.
Here is the setup I currently use
Body: Canon EOS R
Lens: RF100-500 lens
Polarizer filter
Sometimes: extension tubes and a tripod

The extension rings can help reduce the minimum focusing distance, allowing to get even closer to the subject. At the same time, you will not be able any more to focus on far away objects. They are mounted in between the camera and the lens.
Editing
For many of these images, editing in post is rather minimal since most of the effect and the mood is achieved in camera already. Here some considerations:
I like these images to be rather on the bright side. If you have a dark background, this applies to the subject. Since they are rather soft and dreamy, I am very careful not to use too much global contrast, clarity and structure. Below a before and after. While there is a stark difference, not much was really adapted.
This is the image straight out of camera and you’ll notice it’s rather dark. There are two reasons for this: 1) I wanted to make sure the white parts on the grasses are not overexposed and 2) paired with the image stabilization short enough shutter speed to avoid camera shake.

Canon EOS R
1/200 second | f / 7.1 | ISO 400
RF 100-500mm f/4.5-7.1 L IS USM @ 500 mm
While the difference appears rather large, the edits in Adobe Lightroom can be summarized on three lines. The only big correction was the exposure which was raised 1.24 stops. Minimal adaptations were done to vibrance and saturation. Use of the gradation curve and the color-grading to brighten the image further.

Expsoure +1.24 | Vibrance +4 | Saturation +5
Gradation Curve with one point at 124/138
Color Grading Midtones + 36
So you see, most of your work is already done when you take the image. Edits like the one above need only a couple of minutes. But of course not everything is as easy. Some images may need a bit more tweaking on those settings. Some may even require localized color adjustments.
Here is an image of a flower garden scene straight out of camera. As above it’s on the dark side since the yellow flowers in the background were rather bright and I did not want to overexpose them. Also, the applied camera profile brings a lot of contrast.

Canon EOS R
1/320 second | f / 5.6 | ISO 800
RF100-500 f/4.5-7.1 L IS USM @ 254 mm
While the difference after global adjustments may not look to big, the edit was more involved including changes in almost every panel in Lightroom. While the background is smooth, note the brown color on the top left.

Adobe Lightroom global adjustments
Started from linear Camera Profile
Result brighter with raised shadows
Since I could not get the color of the main subject quite right and I found the brown parts in the background detrimental to the image, local adjustments were applied. All in all I find this brings the image much more together.

Adobe Lightroom local adjustments
blue color to the main subject
green/cyan tone to the top left
Of course, you don’t have to go as far with your editing as I do if you don’t want to. What I’d like to point out here is, that these local adjustments can help to cope with a background which is a bit too distracting, be it due to color and / or brightness differences. If you have a hard time composing a soft background in the field, then editing can compensate somewhat for it.
Conclusion
With this, we conlude this workflow tutorial about how to shoot flower close-ups. Since this was a long post which diverted a lot into technical details in the second part, let’s remind ourselves of the workflow:
- find your subject
- get low to the ground, get as close as possible and zoom in as much as you can
- move carefully around your subject to find a suitable background
- integrate out of focus foreground to add softness and color cast
- take the shot with a wide open aperture
I hope you found the tutorial useful and can start using the workflow yourself. If you have any questions or suggestions, please leave them down below in the comments.
Did you like this Tutorial?
I hope it proves useful and you can take something with you. Let me know below if you have any questions, comments, or suggestions – or share directly on social media.